Extreme Altitude & Singletrack: Top Global Mountain Biking Routes for Adventure Enthusiasts

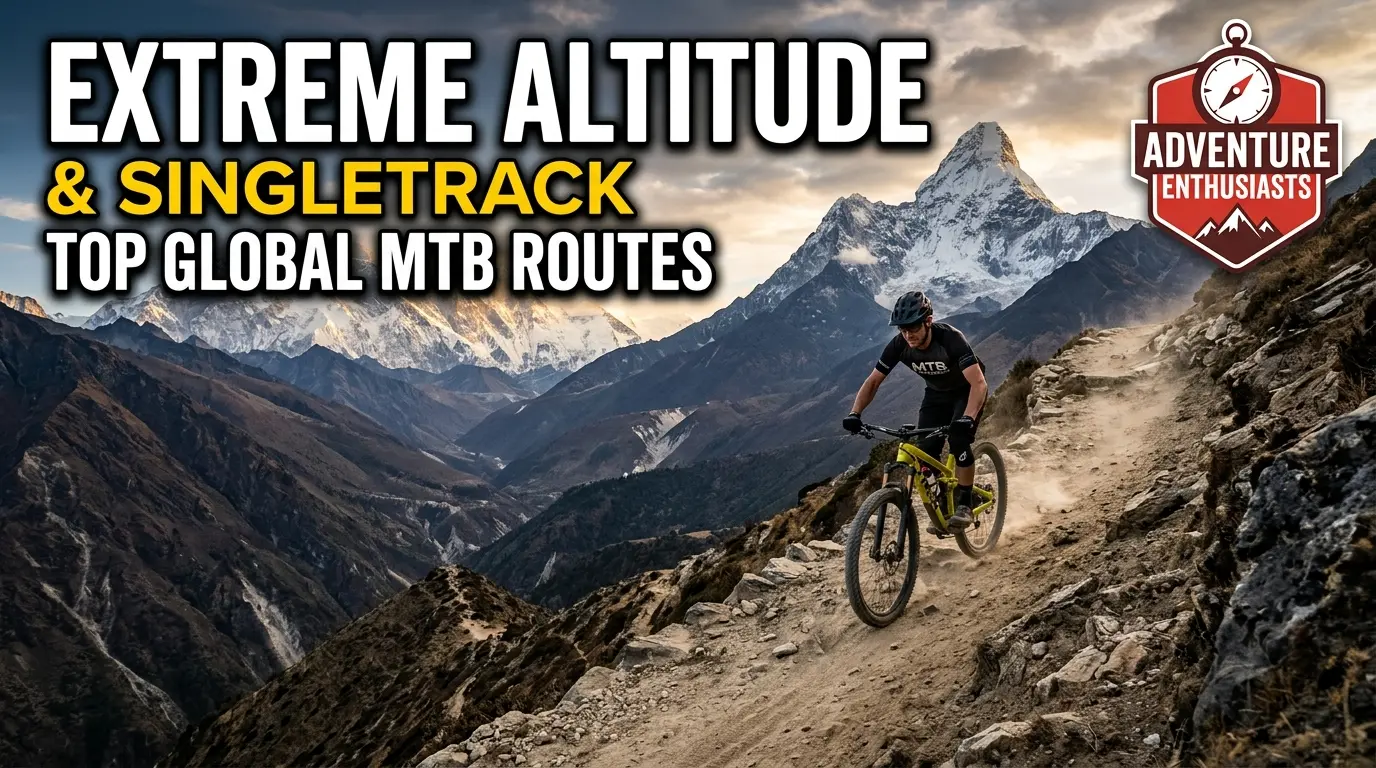
Mountain biking routes in Nepal represent the ultimate challenge for adventure cyclists seeking high-altitude passes, rugged singletracks, and remote Himalayan expeditions. For mountain biking purists, true adventure is not found on paved cycle paths or manicured bike parks. It is found on raw singletracks, ancient trade routes, and high-altitude backcountry trails where fitness meets technical handling. For mountain biking purists, true adventure is not found on paved cycle paths or manicured bike parks. It is found on raw singletracks, ancient trade routes, and high-altitude backcountry trails where fitness meets technical handling. When the jeep tracks turn to scree, the suspension is pushed to its absolute threshold, and the safety nets of urban centers disappear; that is where real mountain biking begins.

Nepal—celebrated globally as the ultimate frontier for foot mountaineering—has quietly evolved into the world’s premier destination for high-altitude mountain biking (MTB). It’s unique geographic staircase drops from the highest peaks on Earth down to sub-tropical jungle floors, providing a variety of vertical drops, technical singletracks, and rugged backcountry lines unmatched by any other country.

This extensive guide breaks down the country’s most formidable mountain biking frontiers, including iconic high-altitude expeditions, premium regional trail networks, and the highly technical trail systems hidden directly inside and along the rim of the Kathmandu Valley.

mountain-biking-routes

1. The Annapurna Circuit & Lupra Valley (Manang & Mustang)

The Classic High-Altitude Pass & Scree Descent

Historically celebrated as one of the world’s most iconic multi-day foot treks, the Annapurna Circuit has transformed into an epic, bucket-list frontier for hardcore mountain bikers and bikepackers. This is not a casual holiday cruise; it is a full-scale alpine expedition executed on two wheels.

[Besisahar: 760m] ──(Sustained Climb)──> [Thorong La Pass: 5,416m] ──(Extreme Descent)──> [Muktinath] ──> [Lupra Valley Singletrack]

The Challenge: Thin Air and Heavy Packs

Riding the Annapurna Circuit requires an intense combination of high-altitude endurance, technical rock-garden handling, and sheer physical resilience. You will face massive hike-a-bike sections where riding is impossible, forcing you to push or hoist a loaded 15kg to 20kg mountain bike up loose scree switchbacks in oxygen-depleted air. The weather is wildly unpredictable; a clear morning can rapidly devolve into a blinding high-altitude blizzard near the pass.

Route Breakdown and Topography

The journey traditionally starts in the subtropical lowlands of Besisahar (760m). From here, riders follow rugged, hand-carved jeep tracks and demanding singletracks winding along the roaring Marsyangdi River valley. As you ascend through Chame (2,670m) and enter the high alpine bowl of Manang (3,540m), the thin air becomes a physical wall.

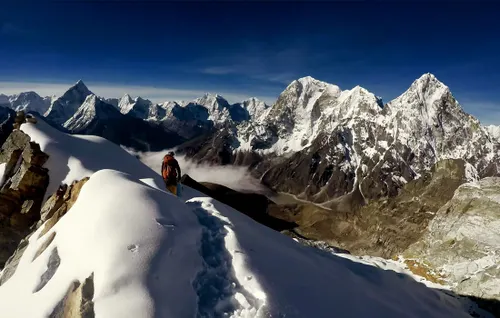
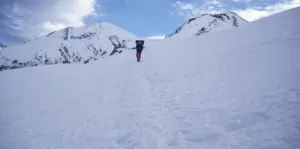
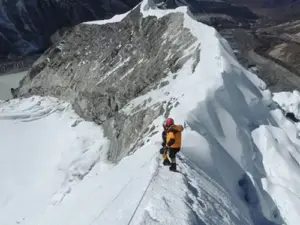
The ultimate crucible of this expedition is crossing the snow-bound Thorong La Pass at an immense 5,416 meters (17,769 feet). Reaching the pass requires a pre-dawn push from Thorong Phedi or High Camp, navigating frozen paths where every pedal stroke feels like a sprint.

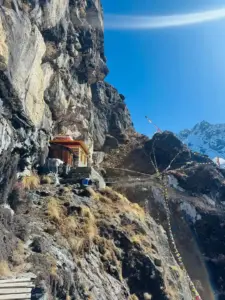
Once over the crest, you drop into the arid, windswept, Tibetan-style rain shadow of Lower Mustang. The descent from the pass down to the sacred pilgrimage site of Muktinath (3,760m) is a screaming, brake-burning downhill rush. From Muktinath, advanced riders bypass the main road and drop into the legendary Lupra Valley singletrack (Lupra Pass DH)—a dry, loose, high-speed canyon trail featuring natural wall rides, shale chutes, and river crossings that finish near the ancient hub of Jomsom.

Technical Parameters

  • Total Distance: Approx. 220–260 km (depending on route variations and vehicle transfers)

  • Total Elevation Profile: Over 6,000 vertical meters of climbing vs. ~4,500m of continuous descent

  • Riding Style: High-altitude bikepacking / All-mountain Enduro

  • Optimal Bike Choice: An aggressive full-suspension trail bike (130mm–150mm travel) with high-volume, tubeless tires to absorb high-velocity impacts against jagged alpine rocks.

2. Upper Mustang: Lo Manthang & The Forbidden Kingdom

mountain-biking-routes

The Arid Himalayan Desert & Ancient Caves Expedition

For riders who define adventure by pure exposure, unique geological formations, and profound cultural isolation, the journey into the Upper Mustang is the undisputed pinnacle of off-road desert mountain biking. This restricted region requires a specialized Department of Immigration permit ($500 per 10 days) and an authorized local guide, making it a pristine, preserved backcountry jewel.

[Jomsom / Kagbeni] ═══════ (High Passes: Gyu La, Marang La up to 4,500m) ═══════> [Walled City of Lo Manthang: 3,810m]

The Challenge: Relentless Headwinds and High Deserts

Upper Mustang is less about slick mud and wet roots and more about systemic dust exposure, high alpine passes, and navigating punishing afternoon headwinds. The Kali Gandaki gorge creates a natural wind tunnel that blows heavily north-to-south starting at midday. Riders must execute climbs across multiple mountain passes above 3,800 meters while managing dry, dehydrating desert air and technical, deep-sand tracks.

Route Breakdown and Topography

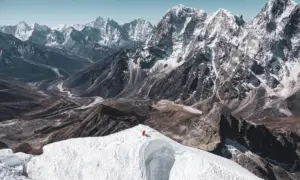
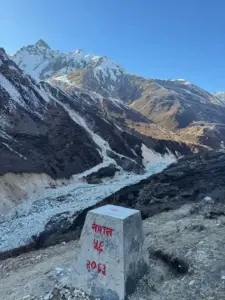
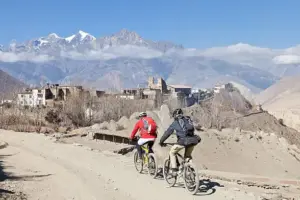
The route maps the ancient salt trading corridor to Tibet, starting from Kagbeni (2,810m) and pushing deep into the restricted boundary. The terrain is a visual spectacle of towering, crimson-colored sandstone cliffs, wind-carved caves, and high-altitude river beds.

Riders must conquer a sequence of demanding mountain passes, including the grueling Gyu La Pass (4,500m) and Marang La (4,230m). The trails consist of old singletracks used by mule trains and newly developed dirt paths that weave past remote villages like Samar, Ghami, and Charang.

The ultimate destination is the ancient, medieval walled city of Lo Manthang (3,810m). From here, riders can explore the surrounding Chhoser cave complexes right up to the Tibetan border, before executing technical, loose-over-hard rock descents back down through the remote, windswept village of Tange.

Technical Parameters

  • Total Distance: Approx. 150–180 km (point-to-point expedition)

  • Total Elevation Profile: Accumulated climbing of over 5,500 vertical meters

  • Riding Style: High-desert backcountry expedition / Rugged trail exploration

  • Optimal Bike Choice: A progressive 29er trail or enduro bike with a highly reliable drivetrain, fast-rolling but wide tubeless tires (2.4″–2.6″) to hook up in loose shale, sand, and heavy dust.

3. Ratnange & Pikey Peak (Lower Solukhumbu)

The Premium Singletrack Trail Center & Viewpoint Drop

If your idea of mountain biking adventure involves testing your technical handling skills against fast, flowing loam, steep pine-forest drops, and deep mountain singletracks, the Phaplu and Ratnange region in the lower Solukhumbu is a mandatory pilgrimage. Home to the highly active Ratnange Trail Center, this area features some of the best purpose-built and natural enduro trails in South Asia.

[Phaplu Hub] ──> [Ratnange Trail Center: 3,300m] ──> [Multi-Day Ridge Push] ──> [Pikey Peak Summit: 4,060m] ──(2.5-Hour Epic Descent)

The Challenge: Steep Root Networks and Intense Gradients

While the lower trail networks feature highly structured, flowing singletrack, pushing up to Pikey Peak requires excellent sub-alpine endurance. The lower sections transition into deep forests filled with slick, wet root networks, deep loam, and sections of jagged granite boulders that demand precise line choices, sharp mental focus, and constant momentum control.

Route Breakdown and Topography

The adventure centers around the mountain hub of Phaplu. From here, riders utilize 4×4 vehicles or pedal power to access the Ratnange Trail Center (3,300m), which features over 60 kilometers of trails like Moksh and Bucha—delivering everything from fast, bermed flow lines to steep, technical black-diamond woods sections.

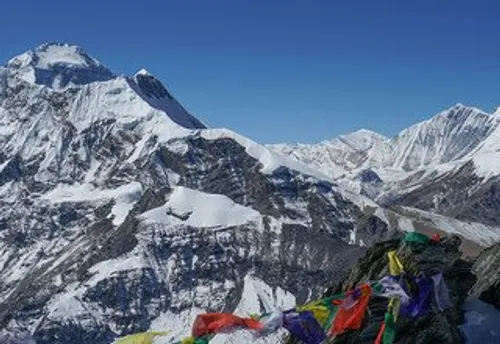
For the ultimate backcountry epic, riders embark on a multi-day ridge journey from Phaplu toward Pikey Peak (4,060m), passing through the village of Jhapre. After a pre-dawn push to the summit to witness a panoramic sunrise showing eight of the world’s highest peaks (including Everest, Makalu, and Lhotse), riders drop their seats and engage a screaming, continuous 2.5-hour downhill singletrack descent that plunges through rhododendron forests, alpine meadows, and remote farming hamlets back to the valley floor.

Technical Parameters

  • Total Distance: Varied (60km+ local trail network; 45km Pikey expedition loop)

  • Total Elevation Profile: Local shuttles offer up to 1,000m of descent per run; Pikey Peak drops over 1,500 vertical meters in a single run.

  • Riding Style: Technical Enduro / All-Mountain Downhill

  • Optimal Bike Choice: A dedicated full-suspension enduro bike with 150mm to 170mm of travel, powerful four-piston hydraulic disc brakes, and heavy-duty casing tires to handle wet roots and sudden rock drops.

4. The Kathmandu Valley Rim & Core Trails

The Jungle Chutes, Clay Ruts, and Urban Escape Singletracks

For riders located inside or directly on the perimeter of the capital, the Kathmandu Valley functions as an aggressive, high-relief playground. The trails slicing down the valley rim and twisting through the interior are characterized by intense vertical drops, steep un-bermed hairpins, slick clay soil, and complex stone staircases. Because these trails double as historic walking and pilgrimage paths, conditions change constantly, keeping riders on their toes.

[Nagarkot Ridge: 2,175m] ──> [Jungle Loam & Clay Chutes] ──> [Ancient Stone Staircases] ──> [Changu Narayan]
[Shivapuri National Park]──> [Helipad & Ranger Witch Trails] ──> [Subtropical Canopy Drops] ──> [Budhanilkantha]
[Chobhar Gorge Sub-Hub]   ──> [Short Technical Rocky Deserts] ──> [Interior Pump & Jump Sessions]
[Hatiban Pine Forests]   ──> [Steep Root-Infested DH Drops]  ──> [South Valley High-Velocity Enduro]

Route Breakdowns and Topography Inside the Valley Hub

  • The Shivapuri National Park System (Northern Rim): This is the undisputed heart of advanced technical riding within the valley. Launching from the high ridges of Kakani or the Shivapuri Peak lines, these trails plunge straight through dense, subtropical jungle canopies. Iconic lines like the Helipad Descent and the Ranger Witch Trail (highly featured in the Asian Enduro Series) throw riders into fast singletracks, deep clay ruts, and massive stone staircases that test your fork’s high-speed compression damping to its absolute limit before ending near the Budhanilkantha shrine.

  • The Nagarkot Enduro System (Eastern Rim): Starting on the ridge of Nagarkot (2,175m), famous for its sweeping views of the Central Himalayan arc, this trail network features screaming descents through dense pine forests. The trails split into multiple technical lines (including the fast-paced Grand Slam and Tower lines), slicing down through natural rock gardens, root gaps, and stepped agricultural terraces before terminating near the UNESCO World Heritage site of Changu Narayan.

  • Hatiban Pine Forests (Southern Rim): Located near Pharping on the southern edge of the valley, Hatiban is a steep, pine-carpeted hillside that acts as Kathmandu’s dedicated downhill sandbox. The trails here are shorter but highly intense, packed with exposed, slippery pine roots, off-camber tight switchbacks, and gap jumps built directly into the steep slope. It is a premier training ground for local enduro and downhill racers.

  • Chobhar Gorge & The South-West Trails (Interior Valley): For a shorter ride inside the valley basin, the rocky ridges around Chobhar Gorge offer fast, technical cross-country and short enduro lines. It features dry, loose-over-hard terrain with sharp rock steps. From Chobhar, riders can link into the Bungamati and Khokana singletracks, which wind through ancient Newari farmlands, mud-brick villages, and deep river ruts along the Bagmati River.

Technical Parameters

  • Total Distance: 15 to 45 kilometers per trail link/network

  • Total Elevation Profile: Averaging 800m to 1,500 vertical meters of pure descent along the rim; 200m–400m punchy circuits internally.

  • Riding Style: Technical Enduro / All-Mountain Downhill / Steep XC

  • Optimal Bike Choice: A slack, aggressive full-suspension enduro bike (150mm–170mm travel) with large rotors (200mm+), and soft-compound, aggressive knobby tires to hook up in loose dirt and muddy jungle chutes.

5. Langtang Valley & Kyanjin Pastures

The Raw Glacial Gorge & Alpine Singletrack Frontier

For riders seeking an absolute wilderness experience characterized by deep river gorges, alpine pastures, and riding directly alongside colossal icefields, the Langtang Valley route offers a rugged, demanding hike-and-bike frontier.

[Syabrubesi: 1,550m] ──(Deep River Gorge)──> [Langtang Village: 3,430m] ──> [Kyanjin Gompa Pastures: 3,830m]

The Challenge: High-Consequence Exposure and Suspension-Busting Boulders

This route is a raw, non-mechanized trail. The lower section follows a deep, narrow river gorge where riders must navigate tight cliffside singletrack with high-consequence exposure. The trail surface is entirely natural: loose glacial moraine, field-boulder gardens, and steep stone switchbacks where carrying your bike over massive landslide debris fields is a regular necessity.

Route Breakdown and Topography

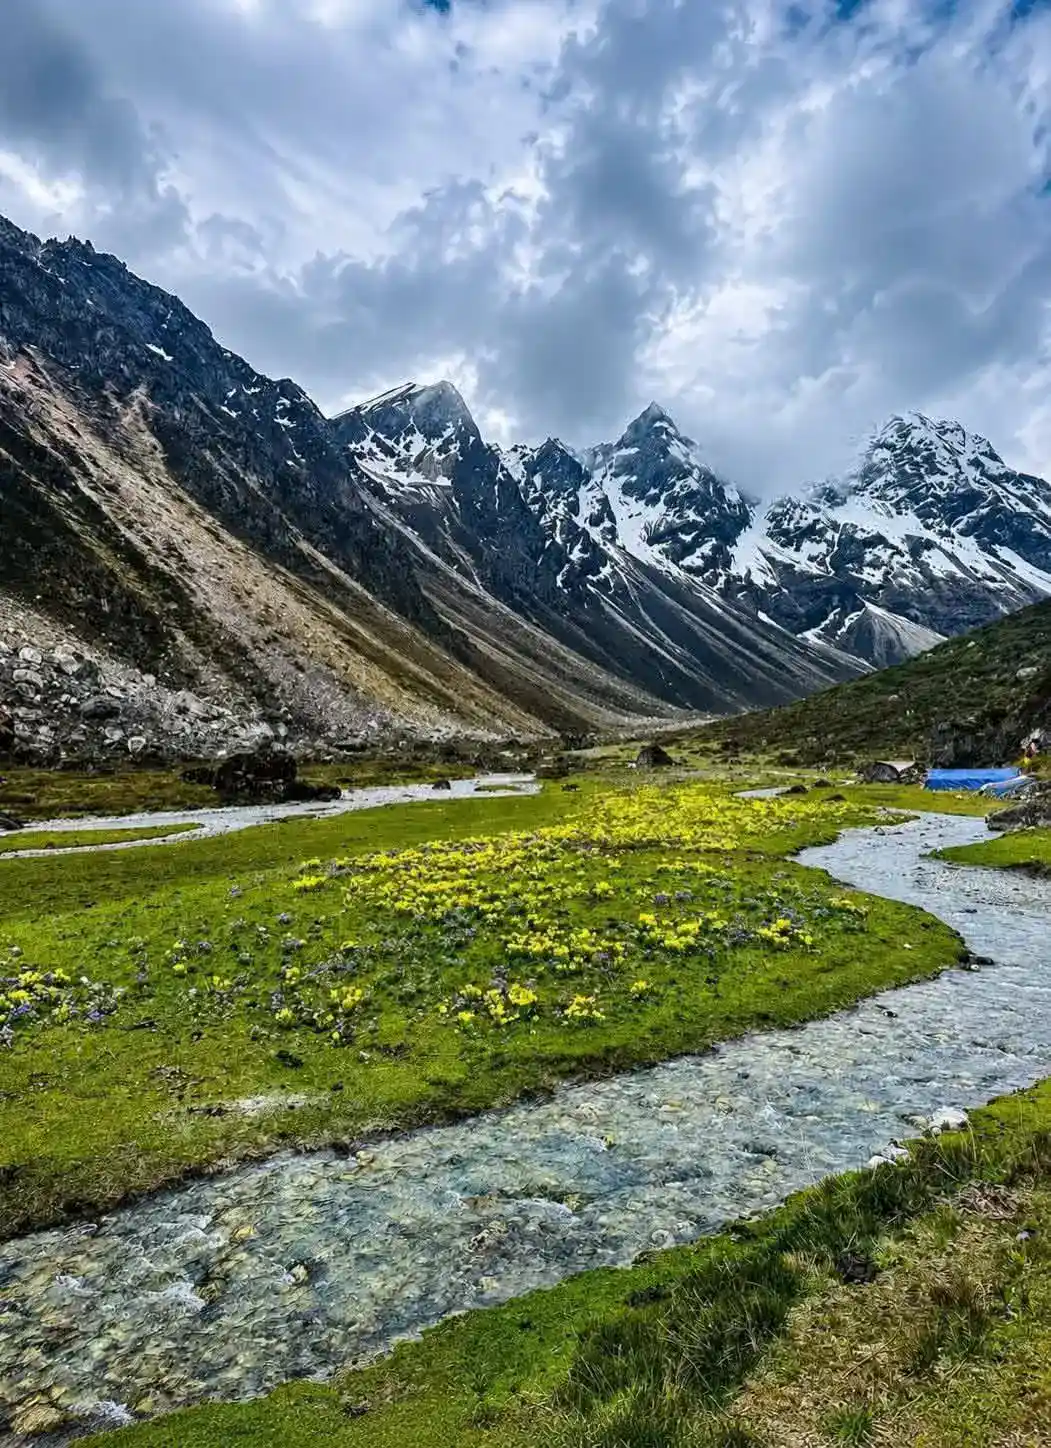
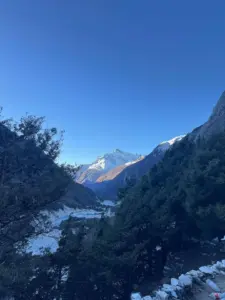
The route begins at the valley gateway of Syabrubesi (1,550m). Riders track upwards along the roaring Langtang Khola, climbing through dense oak and bamboo forests. The terrain opens up dramatically as you pass the old landslide zone of Langtang Village (3,430m) and enter the wide, glacial U-shaped valley floor.

The turnaround point is the historic settlement of Kyanjin Gompa (3,830m), surrounded by towering peaks like Langtang Lirung. Advanced riders can push further into the high-altitude yak pastures of Langsisha Kharka, riding narrow ribbons of singletrack surrounded by frozen glaciers. The return journey is a technical, physical descent down the valley, demanding excellent slow-speed trials skills, precise weight distribution, and absolute control over massive rock steps.

Technical Parameters

  • Total Distance: Approx. 70–80 km (out-and-back route)

  • Total Elevation Profile: ~2,300 meters of technical climbing and matching descent

  • Riding Style: Backcountry Alpine Trials / Extreme Wilderness Technical Exploration

  • Optimal Bike Choice: A heavy-duty, highly robust trail or enduro bike with reinforced sidewall tires (CushCore or equivalent tire inserts are highly recommended to avoid rim damage on sharp glacial boulders).

Strategic Comparison: Nepal’s Premier MTB Routes

To help you choose your next backcountry mission, this comparative matrix contrasts these five world-class routes based on elevation, terrain style, and primary physical demands.

Route / Trail Primary Region Peak Elevation Primary Riding Style Topographical Profile Technical Difficulty Physical Demand
Annapurna Circuit Manang / Mustang 5,416m / 17,769ft High-Altitude Bikepacking Alpine rivers, glacial passes, arid shale canyons Advanced Extreme
Upper Mustang Expedition Restricted Area 4,500m / 14,763ft Desert Backcountry Sandstone cliffs, high passes, dry sandy singletrack Advanced Extreme
Ratnange & Pikey Peak Solukhumbu 4,060m / 13,320ft Enduro / Flow / Downhill Purpose-built flow lines, pine forests, alpine ridges Expert High
Kathmandu Valley Rim & Core Capital Perimeter 2,175m / 7,135ft Technical Enduro / DH / XC Subtropical jungle loam, clay chutes, roots, and stone steps Expert High
Langtang Valley Langtang National Park 3,830m / 12,565ft Alpine Backcountry / Trials Narrow river gorges, loose moraine, giant boulders Expert High

Himalayan Backcountry Survival: Essential Packing Matrix

When you venture far beyond the safety net of urban bike shops and mobile phone networks in remote Himalayan districts, self-sufficiency is everything. A mechanical failure or safety oversight in an isolated valley can quickly escalate from an inconvenience into a survival situation. Your gear strategy must be meticulous.

1. The Ultimate On-Trail Tool Kit

  • Tubeless Repair System: High-thickness tyre plugs (bacon strips) and a tire reamer tool. For massive sidewall tears caused by sharp slate or glacial rocks, always carry a flexible tire boot or a piece of an old toothpaste tube to line the inside of the casing.

  • Chain Management: A multi-tool equipped with a built-in chain breaker and a pair of dedicated quick-links (master links) matching your drivetrain speed (11-speed, 12-speed, etc.).

  • Frame-Specific Spare Parts: A spare derailleur hanger specifically matching your bike’s make and model frame. Derailleur hangers are designed to bend or break during a rock strike to protect your frame; carrying a spare can save you from a 20-mile walk out of a canyon.

  • Inflation Setup: A high-volume hand pump (CO2 cartridges can fail or run out in cold, high-altitude settings) along with a spare heavy-duty inner tube, even if you are running a tubeless setup.

2. High-Altitude and Wilderness Protection

  • Variable Clothing Layers: Himalayan ecosystems can shift from scorching sunshine to freezing downpours or snow within an hour. Always carry a packable, fully seam-sealed waterproof jacket, a lightweight fleece or down layer, and long-finger windproof gloves.

  • First-Aid & Survival Essentials: A compact wilderness first-aid kit containing trauma dressings, antiseptic wipes, blister pads, and pain medication. Space blankets, a reliable lighter or waterproof matches, and a high-decibel survival whistle should live in your pack permanently.

  • Offline Navigation Assets: Do not rely on active cell phone towers. Carry a dedicated handlebar-mounted GPS bike computer with pre-loaded offline topographic maps, and supplement it with an offline mapping app (such as Trailforks or Gaia GPS) downloaded onto a fully charged smartphone paired with a rugged power bank.

Physical Preparation and Acclimatization Strategies

Conquering these rugged routes requires specific physical conditioning. You cannot rely solely on basic road cycling fitness when tackling technical, backcountry trails.

High-Altitude Training and Acclimatization

When riding routes like the Annapurna Circuit or Upper Mustang, elevation is the ultimate equalizer. At 5,000 meters, each breath delivers roughly half the oxygen available at sea level.

  • The Climb Strategy: If possible, arrive at the starting elevation of your trek 2 to 3 days early to let your body adjust before performing strenuous physical work.

  • Pacing Your Effort: Monitor your heart rate closely. Pushing into your anaerobic zone at high altitude causes rapid exhaustion that takes hours to recover from. Shift into an easy climbing gear and keep your cadence smooth and steady.

  • Hydration Dynamics: High-altitude air is incredibly dry, and your respiration rate increases significantly. Drink between 4 and 5 liters of fluid daily, supplemented with electrolyte powders to maintain proper sodium-potassium balances and prevent severe muscle cramping.

Core and Upper-Body Conditioning

Descending thousands of vertical meters over rough rock gardens puts immense strain on your upper body, core, and legs.

  • Anti-Arm-Pump Training: Build forearm and grip endurance by incorporating dead-hangs and farmers-walks into your gym routine. This helps maintain solid brake control during long descents.

  • Core Stabilization: Long hours holding an aggressive posture on a mountain bike require excellent lower-back and abdominal strength. Incorporate planks, kettlebell swings, and deadlifts to build a core that protects your spine from hard trail impacts.

Sustainable Trail Practices and Backcountry Ethics

As mountain biking expands into remote global frontiers, protecting these natural trails and supporting local host communities is essential for long-term sustainability.

  • Ride Open, Established Lines: Never cut corners or create new paths across delicate alpine meadows. This causes severe erosion and deep gullies during the rainy or monsoon seasons, permanently ruining the trail structure.

  • Yield Responsibly: Yield the trail appropriately to other users. When encountering trekkers or heavily loaded livestock trains (such as mules or yaks) on narrow mountain paths, always pull over completely on the safe hillside (not the drop-off side), stop your bike, and let them pass safely.

  • Support Local Economies: When traveling through remote regions like Nepal’s Mustang district or the isolated mountain towns along the Great Divide, spend your money directly within the communities. Stay in local teahouses, buy food from family-run lodges, and hire local guides and logistics teams. This ensures that adventure tourism directly benefits the people who maintain these historic pathways.

Conclusion: Finalizing Your Expedition Blueprint

Stepping away from manicured trails to take on the world’s most demanding backcountry mountain bike routes is a powerful, transformative experience. Whether you choose the extreme altitude of the Annapurna Circuit, the vast culture of Upper Mustang, or the raw jungle singletracks hidden directly inside the Kathmandu Valley Rim, these routes offer far more than a simple adrenaline rush—they are true expeditions that test your preparation, self-reliance, and mental grit.

Nepal offers some of the most diverse and challenging mountain biking routes in Nepal, ranging from the extreme altitude of the Annapurna Circuit to the technical singletracks of Kathmandu Valley and the remote wilderness of Langtang. Whether you are seeking multi-day bikepacking expeditions, enduro descents, or high-desert adventures, these mountain biking routes in Nepal provide unforgettable experiences for every serious rider.

The key to a successful backcountry expedition lies in balancing absolute respect for the environment with thorough logistical preparation. Build your fitness, refine your mechanical skills, respect the local cultures, and head out onto the trail knowing you are experiencing the absolute peak of global mountain biking adventure!

The Celestial Arc: Complete Guide to Nepal’s Premier Himalayan Sunrise Viewpoints

Few travel experiences match the sheer magic of watching the first golden rays of dawn hit the snow-capped, monolithic walls of the Himalayas. Because of Nepal’s unique geography—stretching from low-altitude hill stations to the highest ridges on Earth—you can experience world-class sunrises whether you are a casual luxury traveler or an alpine trekker.

At dawn, the unique atmospheric conditions of the high Himalayas create a spectacular display of light. Before the sun rises, the peaks appear as deep blue shadows against a dark sky. As the first light hits the summits, the snow reflects vibrant shades of pink, orange, and gold, while the valleys below remain in darkness.

This comprehensive guide breaks down the premier sunrise viewpoints across Nepal, categorized by accessibility, region, and physical demand. It provides complete topographical details, mountain profiles, and logistical blueprints to help you plan the perfect morning photography or travel excursion.

1. Accessible Hill Stations (No Trekking Required)

Ideal for families, photographers, or those on short timelines who want panoramic mountain views straight from a vehicle, cable car, or boutique resort balcony.

[Kathmandu Basin] ──(32km East Drive)──> [Nagarkot Ridge: 2,175m] ──> Views of 8 Himalayan Ranges
[Pokhara Valley]  ──(30-Min Drive)─────> [Sarangkot Hill: 1,600m]  ──> Mirror View over Phewa Lake

Nagarkot (2,175m / 7,135ft) — The Valley’s Sentinel

Located 32 kilometers east of Kathmandu in the Bhaktapur District, Nagarkot is the most famous high-altitude hill station on the rim of the Kathmandu Valley. Perched strategically on a ridge, it has served for centuries as a lookout point across the central Himalayan arc.

  • The Topography: A high-altitude ridge line that drops sharply into terraced agricultural valleys to the north and east, providing an unobstructed 360-degree horizon line.

  • The Mountain Profile: On clear mornings, Nagarkot offers a sprawling, cinematic view of 8 out of Nepal’s 13 distinct Himalayan ranges. The panorama runs seamlessly from Dhaulagiri and Annapurna in the far west, past the massive walls of the Langtang Himal, Ganesh Himal, and Jugal Himal, to Gaurishankar, Cho Oyu, and even a distant, long-lens glimpse of Mount Everest’s tip on exceptionally clear autumn mornings.

  • The Experience: It is the ultimate luxury city escape. Travelers typically drive up from Kathmandu the afternoon prior, stay in one of the ridge’s premium boutique resorts, and wake up to watch the dawn light develop right from their private balconies or the public view tower. The sight of the valley fog sitting low like a white sea while the peaks ignite above is a favorite composition for landscape photographers.

Sarangkot (1,600m / 5,249ft) — The Pokhara Amphitheater

Sarangkot is a sharp, prominent hill situated just 11 kilometers northwest of Pokhara’s Lakeside district. It sits directly above the deep fracture of the Seti River gorge.

  • The Topography: A steep, narrow ridge that separates the main Pokhara Valley basin from the remote valleys of the lower Annapurna conservation footprint.

  • The Mountain Profile: Sarangkot provides a front-row seat to the Annapurna Massif, Dhaulagiri Range, and Hiunchuli. The absolute star of the morning show is the iconic, sacred, unclimbed peak of Machapuchare (6,993m / 22,943ft), known widely as the “Fishtail Mountain.” Because of its geographic proximity, Machapuchare rises like a colossal granite spire directly across the valley, catching the dawn light long before the lower hills are illuminated.

  • The Experience: Accessible via a brisk 30-minute pre-dawn taxi ride or via the Annapurna Cable Car system. The dawn experience here is unique because it combines two distinct visual elements: the glowing snow-fields of the high peaks above and the calm, glass-like reflection of Phewa Lake directly below. Watch for paragliders launching from the cliffs just after sunrise as the thermal air currents begin to warm.

Chandragiri Hill (2,551m / 8,369ft) — The Himalayan Balcony

Chandragiri Hill forms the southwest boundary of the Kathmandu Valley rim and is historically significant as the vantage point from which King Prithvi Narayan Shah first gazed upon the valley before unification.

  • The Topography: A heavily forested, steep ridge rising sharply from the valley floor at Thankot.

  • The Mountain Profile: Provides an ultra-wide, linear view of the northern skyline. On a clear day, the view extends from the massive white bulk of Manaslu (8,163m) in the west, through the entire Ganesh and Langtang chains, all the way to the jagged profile of Mount Gaurishankar in the east.

  • The Experience: Easily accessed via a modern, 10-minute cable car ride from the Thankot base station. Watching the sun break over a thick blanket of low inversion fog filling the entire Kathmandu Valley basin makes it feel as if you are standing on an island floating above the clouds.

Dhulikhel (1,550m / 5,085ft) — The Cultural Sunrise

An ancient Newari town located 30 kilometers southeast of Kathmandu along the Arniko Highway, offering a quieter alternative to Nagarkot.

  • The Topography: A valley-rim plateau characterized by centuries-old brick architecture and extensive hand-carved agricultural terraces.

  • The Mountain Profile: A sweeping focus on the Eastern and Central Himalayas, with incredibly clear framings of Langtang Lirung, Dorje Lakpa, and the massive, snow-covered wall of Gaurishankar.

  • The Experience: Dhulikhel is highly favored by travelers seeking a calm, spiritual morning experience. The sunrise unfolds over a landscape of traditional farmhouses, ancient shrines, and pine forests, making it a wonderful location for combining cultural photography with landscape shots.

2. Iconic Trekking Viewpoints (Moderate Effort)

For active travelers willing to lace up their hiking boots and ascend through rhododendron forests to stand in the heart of the sub-alpine zones.

                       [Dhaulagiri: 8,167m]           [Annapurna I: 8,091m]
                                 \                             /
                                  \                           /
                       ────────────┴─────────────────────────┴────────────
                            [ POON HILL OBSERVATION DECK: 3,210m ]
                       ───────────────────────────────────────────────────
                                                ▲
                                                │ (45-Minute Pre-Dawn Climb)
                                                │
                                      [Ghorepani Teahouses]

Poon Hill (3,210m / 10,531ft) — The Photographer’s Gateway

Poon Hill is the crown jewel of short-duration trekking viewpoints in Nepal. Situated directly above the village of Ghorepani in the Myagdi District, it requires a 3-to-5-day loop trek starting from the trailheads near Pokhara.

  • The Topography: A rounded, grassy sub-alpine summit equipped with a multi-tiered wooden observation tower facing due north toward the great Himalayan fracture.

  • The Mountain Profile: A complete 360-degree panorama dominated by two of the world’s fourteen 8,000-meter giants: Dhaulagiri (8,167m / 26,795ft) to the west and Annapurna I (8,091m / 26,545ft) to the north. These titans are flanked by a supporting cast of peaks, including Annapurna South, Hiunchuli, Nilgiri, and the sharp profile of Machapuchare.

  • The Experience: Trekkers wake up at 4:30 AM to make the final, headlamp-lit 45-minute climb from Ghorepani through frosted rhododendron forests. Standing at the top with hundreds of fellow travelers as the first rays of light transform the icy faces from cold blue to brilliant amber is a classic Nepali rite of passage.

Mardi Himal Upper Viewpoint (4,200m / 13,779ft) — The Spine Ride

The Mardi Himal trail is an offbeat, fast-growing ridge trek that branches away from the traditional Annapurna Base Camp route, tracking along a narrow mountain ridge toward the base of Machapuchare.

  • The Topography: A sharp, dramatic alpine ridge line with sheer drops into the Modi Khola valley to the west and the Mardi Khola valley to the east.

  • The Mountain Profile: This viewpoint offers an incredibly intimate look at Machapuchare and Annapurna South. Unlike Poon Hill, where the mountains form a distant wall across the horizon, Mardi Himal places you directly on a structural ridge right beneath the southwest face of Fishtail Mountain. The relief is so vertical that you must tilt your camera upward to frame the summits.

  • The Experience: Leaving the high camp at 4:00 AM, trekkers navigate a narrow, occasionally icy mountain path marked by stone cairns. Because the route follows a ridge, you enjoy expansive views on both sides throughout the entire pre-dawn climb. It is significantly less crowded than Poon Hill, providing a raw, wilderness-focused sunrise experience.

Khopra Danda (3,660m / 12,007ft) — The Wilderness Ridge

An exceptional alternative to the busy trails of Ghorepani, Khopra Danda (Ridge) sits high above the deepest gorge in the world—the Kali Gandaki River valley.

  • The Topography: A high, isolated pasture ridge that stands completely exposed between the main Annapurna and Dhaulagiri massifs.

  • The Mountain Profile: A jaw-dropping, eye-level view of the massive south face of Dhaulagiri (8,167m), which feels close enough to touch. To the east, the trail looks across at Annapurna South, Nilgiri, and Tukuche Peak.

  • The Experience: Reached via a demanding branch of the Annapurna trekking network. The sunrise here is stunning because no intermediate hills are blocking your view; you look straight down into the depths of the Kali Gandaki valley while the peaks above glow with morning light.

3. Ultimate High-Altitude Frontiers (Extreme Effort)

For experienced adventurers, mountaineers, and hardcore trekkers prepared to navigate thin air, freezing temperatures, and rugged terrain to stand eyeball-to-eyeball with the world’s highest peaks.

   [Gokyo Ri: 5,357m]   ──> Panoramic framing of 4 Separate 8,000m Peaks + Turquoise Lakes
   [Kala Patthar: 5,555m] ──> Front-row face of Mt. Everest (8,848.86m) & Khumbu Glacier

Kala Patthar (5,555m / 18,225ft) — The Face of Everest

Kala Patthar (meaning “Black Rock” in Nepali) is a prominent landmark located on the southern ridge of Pumori in the Khumbu region, sitting directly above the final trail outpost of Gorak Shep.

  • The Topography: A steep, wind-scoured ridge of dark shale and giant granite boulders jutting out into the upper reaches of the Khumbu Glacier system.

  • The Mountain Profile: This is the definitive vantage point for viewing the true summit of Mount Everest (8,848.86m / 29,031ft), alongside Lhotse (8,516m), Nuptse (7,861m), and Pumori (7,161m). Because Mount Everest’s summit is actually obscured by the massive shoulder of Nuptse when standing at its own Base Camp, Kala Patthar is the primary objective for photographers seeking the classic shot of the world’s highest peak.

       [Mt. Everest: 8,848m]          [Nuptse: 7,861m]
                \                           /
                 \                         /
            ──────┴───────────────────────┴───────
                [ KALA PATTHAR RIDGE: 5,555m ]
            ──────────────────────────────────────
                              ▲
                 (Grueling 2-Hour Alpine Climb)
                              │
                    [Gorak Shep Lodges]
  • The Experience: The climb begins around 4:00 AM from Gorak Shep in intense alpine cold, with temperatures regularly dropping between -10°C to -20°C. Navigating the steep switchbacks requires slow, measured pacing due to the extreme altitude. The reward is an unmatched Himalayan view: watching the sun break directly from behind the ridge of Everest, casting a giant shadow across the vast, crevassed expanse of the Khumbu Glacier below.

Gokyo Ri (5,357m / 17,575ft) — The Four-Titan Panorama

Gokyo Ri is a classic peak rising out of the northern shore of the third Gokyo Lake (Dudh Pokhari) within the high-altitude Everest region.

  • The Topography: A freestanding, pyramid-shaped alpine peak that offers an unrestricted, wide-angle view across the entire Khumbu valley system.

  • The Mountain Profile: Many professional landscape photographers rate the sunrise from Gokyo Ri as superior to Kala Patthar. From this single location, your camera can frame four of the world’s fourteen 8,000-meter peaks simultaneously: Mount Everest (8,848m), Lhotse (8,516m), Makalu (8,485m), and Cho Oyu (8,188m).

  • The Experience: The pre-dawn climb involves a relentless 2-to-3-hour trudge up steep, sandy, and rocky trails from the Gokyo lakeside lodges. The view from the summit is spectacular, combining the rugged granite forms of the 8,000-meter peaks with the turquoise waters of the Gokyo Lakes and the massive ice fields of the Ngozumpa Glacier (the longest glacier in the Himalayas) directly below.

Thorong La Pass (5,416m / 17,769ft) — The High Pass Dawn

The absolute crux and highest point of the world-famous Annapurna Circuit Trek, separating the Manang Valley from the arid Mustang region.

  • The Topography: A high-altitude mountain pass flanked by the massive peaks of Khatung Kang and Yakawa Kang.

  • The Mountain Profile: A stark, desert-like alpine landscape offering views of the Dhaulagiri Range, the Damodar Himal, and the deep trench of the Kali Gandaki Gorge.

  • The Experience: Trekkers typically leave High Camp or Thorong Phedi as early as 3:30 AM to safely cross the pass before high afternoon winds pick up. Reaching the summit marker—decorated with hundreds of colorful Buddhist prayer flags—just as the sun illuminates the Chulu peaks and Dhaulagiri is an unforgettable, high-altitude experience.

4. Off-the-Beaten-Path & Cultural Hidden Gems

For seasoned travelers looking to escape the classic tourist routes and enjoy pristine sunrises alongside unique local traditions.

Pikey Peak (4,065m / 13,336ft) — Hillary’s Favorite View

Located in the lower Solukhumbu region, Pikey Peak is an off-the-beaten-path destination that has gained steady recognition among travelers seeking a quiet alternative to the main Everest trails.

  • The Topography: A high sub-alpine ridge that stands alone south of the main Himalayan wall, offering an exceptionally wide field of view.

  • The Mountain Profile: Sir Edmund Hillary, the first man to stand on the summit of Mount Everest alongside Tenzing Norgay, famously stated that the view of Everest from Pikey Peak was his absolute favorite. The peak offers a panoramic view stretching from Mt. Shishapangma in the west past Everest, Lhotse, Makalu, all the way to Kangchenjunga in the far east.

  • The Experience: Reached via a gentle 5-to-7-day trek through traditional Sherpa and Tamang villages. The sunrise here is special because the peak’s southern placement allows you to capture the entire length of the high Himalayas illuminated by the morning sun from an elegant side-profile angle.

Antu Danda (1,977m / 6,486ft) — The First Light of Nepal

Situated in the far eastern corner of Nepal within the Ilam District, Antu Danda sits right on the border separating Nepal from Darjeeling, India.

  • The Topography: A lush, rolling hill station entirely carpeted by historic tea gardens, manicured pine forests, and local agricultural homesteads.

  • The Mountain Profile: The northern horizon is anchored by the massive, multi-peaked ridge of Kangchenjunga (8,586m / 28,169ft), the third-highest mountain on Earth.

  • The Experience: Because of its geographic placement in the far eastern reaches of the country, Antu Danda is the very first place in Nepal to receive sunlight each morning. The sunrise here offers a completely different look than the high-altitude rocky valleys, trading harsh stone and ice for rolling green tea estates, low valley mists, and unique local homestays.

Mohare Danda (3,300m / 10,826ft) — The Eco-Community Ridge

An eco-trekking route that runs parallel to Poon Hill but focuses entirely on sustainable, community-run lodge operations.

  • The Topography: A high, open pasture ridge covered in pine and rhododendron trees, directly facing the Annapurna South wall.

  • The Mountain Profile: Offers an identical view of Dhaulagiri and the Annapurnas as Poon Hill, but from a slightly closer, more direct southern angle.

  • The Experience: Because the trail is managed entirely by local village cooperatives, there are no large commercial hotels. You wake up in a cozy, community-run eco-lodge and walk just a few steps to the ridge line, enjoying the same spectacular mountain sunrise as Poon Hill without the heavy tourist crowds.

Technical Specifications: Comparative Matrix

This technical directory serves as a comparative guide to help you match your physical capabilities, location, and travel style with the ideal viewpoint location.

Viewpoint Name Regional Sector Precise Altitude Access Strategy Technical Difficulty Crowding Intensity Primary Peaks Visible
Sarangkot Pokhara / Annapurna 1,600m / 5,249ft Vehicle Drive / Cable Car Easy (Walkway) High Machapuchare, Annapurna II, Dhaulagiri
Antu Danda Ilam / Far-East 1,977m / 6,486ft Overland Jeep Transfer Easy (Steps) Low Kangchenjunga, Jannu
Nagarkot Kathmandu Valley Rim 2,175m / 7,135ft Private Vehicle Drive Easy (View Tower) High Langtang Lirung, Ganesh Himal, Everest (Tip)
Chandragiri Kathmandu Valley Rim 2,551m / 8,369ft 10-Min Cable Car Ride Easy (Platform) Moderate Manaslu, Ganesh Himal, Langtang Range
Poon Hill Ghorepani / Annapurna 3,210m / 10,531ft 3-5 Day Trekking Loop Moderate High Dhaulagiri I, Annapurna South, Machapuchare
Mohare Danda Annapurna Foothills 3,300m / 10,826ft 4-5 Day Eco-Trek Moderate Low Dhaulagiri, Annapurna I, Hiunchuli
Khopra Danda Annapurna / Kali Gandaki 3,660m / 12,007ft 6-8 Day Wilderness Trek Demanding Low Dhaulagiri South Face, Nilgiri, Tukuche
Pikey Peak Lower Solukhumbu 4,065m / 13,336ft 5-7 Day Cultural Trek Moderate Low Everest, Lhotse, Makalu, Gaurishankar
Mardi Himal Upper Annapurna Ridge 4,200m / 13,779ft 5-6 Day Alpine Trek Demanding Moderate Machapuchare (Close-up), Annapurna South
Gokyo Ri Gokyo Valley / Everest 5,357m / 17,575ft 11-13 Day High Trek Strenuous Moderate Everest, Lhotse, Makalu, Cho Oyu
Thorong La Manang / Annapurna Cir. 5,416m / 17,769ft 12-14 Day Circuit Trek Strenuous High Dhaulagiri, Chulu Peaks, Yakawa Kang
Kala Patthar Gorak Shep / Everest 5,555m / 18,225ft 12-14 Day EBC Trek Strenuous High Mount Everest, Nuptse, Lhotse, Pumori

Environmental Dynamics & Seasonal Considerations

To secure pristine, uninterrupted mountain visibility, coordinating your travel dates with the regional weather cycles of the Indian subcontinent is absolutely critical.

[AUTUMN] Oct - Nov : Crisp Air, Post-Monsoon Clarity, Optimal High-Altitude Trekking
[SPRING] Mar - Apr : Rising Temperatures, Valley Haze, Wild Rhododendron Blooms

The Autumn Window (October to November) — The Gold Standard

This is universally recognized as the prime viewing window across all elevations in Nepal. The heavy monsoon rains of the summer months have completely washed the atmosphere of dust, pollen, and pollution. The morning air is crisp, dry, and exceptionally stable, offering flawless blue skies and maximum long-range visibility. High-altitude viewpoints like Kala Patthar and Gokyo Ri are best visited during this window.

The Spring Window (March to April) — The Colorful Choice

Spring offers comfortable, warmer temperatures for morning excursions. While the lower valleys can occasionally gather ambient dust or haze by late morning, the early dawn hours remain consistently clear. This season is highly favored for mid-altitude viewpoints like Poon Hill and Nagarkot, as the surrounding hillsides come alive with blooming rhododendron forests, adding a beautiful crimson framework to your mountain photos.

The Winter (December to February) and Monsoon (June to September) Challenges

  • Winter: Offers intensely clear morning skies and nearly empty viewpoints, but comes with extreme, freezing temperatures. High-altitude spots above 4,000 meters require specialized cold-weather gear, and trails can often be blocked by heavy snow.

  • Monsoon: Heavy summer rains mean that the high peaks are almost constantly hidden behind thick storm clouds. The risk of landslides along driving mountain roads and slippery, leech-prone jungle trails makes morning viewpoint excursions highly unpredictable and generally unrewarding.

Field Guide: Photography Strategies for Himalayan Dawn

Capturing the massive scale and extreme dynamic range of a Himalayan sunrise requires specific adjustments to your shooting technique and gear selection.

1. Managing the Extreme Dynamic Range

As the sun breaks over the mountain ridges, the contrast between the highly reflective, snow-covered peaks and the dark, unlit valleys below can easily overwhelm your camera’s sensor.

  • The Exposure Target: Set your camera to spot-metering and meter directly off the illuminated snow-fields to prevent overexposing the highlights. It is much easier to recover shadow details from the dark valleys during post-processing than it is to fix blown-out highlights on a glacier.

  • Bracket Your Shots: Utilize your camera’s Automatic Exposure Bracketing (AEB) feature to take 3 or 5 separate shots at varying exposure values (-2EV, -1EV, 0, +1EV, +2EV). This gives you the ideal exposures needed to blend into a single High Dynamic Range (HDR) image later.

2. Lens Selection and Composition Options

  • The Telephoto Zoom (70-200mm / 100-400mm): Crucial for high-altitude spots like Nagarkot or Kala Patthar. A telephoto lens compresses the scene, allowing you to isolate individual peaks, ridges, or icefalls, capturing the intricate textures of the glaciers and wind-blown snow plumes trailing off the summits.

  • The Wide-Angle Prime (16-35mm): Best suited for locations like Sarangkot or Gokyo Ri, where you want to frame the wide arc of the mountains alongside foreground features like Phewa Lake or the turquoise waters of the Gokyo Lakes.

3. Essential Gear Stability and Power Backups

  • A Heavy-Duty Tripod: Pre-dawn mountain ridges are frequently subject to high winds. A sturdy tripod is essential for keeping your camera stable during slow exposure adjustments before the sun fully rises.

  • Protecting Battery Life: Extreme cold accelerates chemical drainage in lithium-ion batteries. Keep your spare camera and phone batteries tucked inside an inner jacket pocket close to your body heat until the exact moment you need to insert them into your device.

Safety Blueprints for High-Altitude Viewpoints

When pushing above the 3,000-meter threshold for early morning treks, the combination of darkness, sub-zero temperatures, and thin air requires strict safety adherence.

  • Preventing Acute Mountain Sickness (AMS): For high-altitude view ridges like Mardi Himal, Gokyo Ri, and Kala Patthar, ensure your itinerary includes dedicated acclimatization days in the preceding villages. Never attempt a rapid vertical ascent for a sunrise if you are experiencing a persistent headache, dizziness, or nausea.

  • Illumination Protocols: Always use a high-lumen, reliable headlamp for pre-dawn climbs, leaving your hands entirely free to hold trekking poles or navigate rocky steps. Do not rely on a smartphone flashlight, which can drop to zero battery instantly in the mountain cold.

  • Thermal Layering Systems: Standing stationary on an exposed mountain peak waiting for the sun to rise causes your core body temperature to drop quickly. Dress in a comprehensive three-layer system: a moisture-wicking synthetic base layer, an insulating mid-layer (down jacket), and a fully windproof/waterproof outer shell. Bring along a thermal flask filled with hot water or ginger tea to stay warm while you wait.

Conclusion: Crafting the Perfect Morning Itinerary

Whether you choose the easy luxury of watching the mountains turn gold from a resort balcony in Nagarkot, the classic trail experience of climbing Poon Hill, or the ultimate high-altitude challenge of standing at the foot of Mount Everest on Kala Patthar, witnessing a Himalayan sunrise is an unforgettable highlight of traveling in Nepal.

The key to a rewarding experience lies in matching the location with your physical conditioning, choosing the correct season, and preparing your gear for the early morning mountain cold. Pack your layers, check the weather forecasts, and step out onto the view decks ready to witness one of the most magnificent natural spectacles on earth.

The Ultimate Guide to Langsisha Kharka: The Hidden Glacial Amphitheater of Langtang

The Langtang Valley has long been celebrated as one of Nepal’s most accessible yet visually stunning trekking destinations. Tucked away just north of Kathmandu, it offers an incredible mix of dense rhododendron forests, ancient Tamang culture, and dramatic alpine scenery. However, while the vast majority of trekkers consider Kyanjin Gompa (3,870m / 12,697ft) the final destination of their journey, a magnificent frontier lies further east—Langsisha Kharka (4,160m / 13,648ft).

For travelers who crave raw wilderness, untouched landscapes, and true mountain solitude, Langsisha Kharka is the ultimate hidden gem of the Langtang region. It is a vast, glacier-carved pastureland surrounded by colossal walls of rock and ice, serving as the gateway to challenging trekking peaks and technical mountaineering routes like Langsisha Ri (6,427m) and Dorje Lhakpa (6,966m).

Whether you are planning an extended day-hike from Kyanjin Gompa or embarking on a fully-fledged camping expedition toward the high passes, this comprehensive guide covers everything you need to know about exploring the wilderness of Langsisha Kharka.

What and Where is Langsisha Kharka?

langsisha-kharka

Langsisha Kharka (also spelled Langshisha) is a high-altitude alpine meadow situated in the upper reaches of the Langtang Valley, within the boundaries of the Langtang National Park.

[Kathmandu] ──(Drive)──> [Syabrubesi] ──(Trek)──> [Lama Hotel] ──> [Kyanjin Gompa] ──> [Langsisha Kharka]

In the local Tibetan-linked dialects spoken by the Tamang and Sherpa communities of the valley, Kharka translates directly to “pasture” or “grazing land.” For generations, this remote valley floor has served as a summer grazing ground for yaks. Local herders drive their livestock up to these nutrient-rich alpine meadows when the winter snows melt, living in simple, temporary stone huts (Goths) scattered across the rocky terrain.

Geographically, Langsisha Kharka sits at an elevation of approximately 4,160 meters (13,648 feet). It marks the point where the main, U-shaped glacial valley of Langtang begins to branch into deep, wild amphitheaters dominated by massive glacial moraines and intersecting ice fields. Standing in the center of the Kharka, you are treated to a 360-degree theater of towering peaks, including Langshisha Ri, Pemthang Karpo Ri, Kanshurum, and the Jugal Himal extension.

Why You Should Add Langsisha Kharka to Your Langtang Itinerary

Most standard Langtang Valley itineraries allot one or two acclimatization days at Kyanjin Gompa. Typically, trekkers use this time to scale Kyanjin Ri (4,773m) or the more demanding Tserko Ri (4,984m). While these viewpoints offer breathtaking panoramic views from an elevated perspective, they can become crowded during peak seasons.

Here is why pushing eastward along the valley floor to Langsisha Kharka offers a completely different, deeply rewarding alternative:

1. Escape the Crowds and Find Solitude

While dozens of trekkers head up the switchbacks of Tserko Ri every morning, only a handful venture toward Langsisha Kharka. The trail immediately plunges you into a quiet, meditative wilderness where the only sounds are the rushing waters of the infant Langtang Khola, the whistling wind, and the occasional chime of a yak’s bell.

2. Witness Living Pastoral Culture

Langsisha Kharka is not a manufactured tourist destination; it is a functional, seasonal pastoral settlement. If you trek during the late spring or summer months, you will witness the traditional high-altitude lifestyle of the local herders. Watching a herd of yaks grazing against a backdrop of 6,000-meter ice walls is an unforgettable sight that connects you deeply to the living cultural heritage of the Himalayas.

3. A Paradise for Glacier Lovers

The hike to Langsisha Kharka brings you closer to the actual valley glaciers than almost any other trail in the region. As you near the pasture, you will see the dramatic terminus of the Langsisha Glacier and the massive lateral moraines carved out over millennia. The raw, debris-covered ice formations and the sound of shifting ice echoing off the rock faces provide an incredible sensory experience.

4. Breathtaking Low-Angle Mountain Views

Unlike the steep, vertical ascents of the nearby peaks, the walk to Langsisha Kharka follows a relatively gradual incline along the valley floor. This provides a unique, low-angle perspective of the mountains. Instead of looking down on the valley, you are standing directly at the feet of giants like Ganchenpo (6,378m) and Urkinmang (6,151m), making their vertical relief feel vastly more imposing.

The Myth of Langsisha Kharka: The Legend of the Red Ox

langsisha-kharka

Like many landmarks in the sacred hidden valleys (Beyuls) of the Himalayas, Langsisha Kharka is steeped in rich spiritual mythology. Local elders tell a beautiful legend explaining how this remote pasture was discovered and named.

According to local folklore, centuries ago, a revered Buddhist lama living in Tibet lost a magnificent, sacred red ox from his herd. The ox wandered away, crossing the high, snow-bound mountain passes that separate Tibet from Nepal. The lama tracked the animal through the jagged peaks and down into an uncharted, pristine valley.

Finally, the lama discovered his ox resting at a vast, beautiful pastureland deep within the valley. However, shortly after being found, the sacred ox passed away at that very spot. The lama, recognizing the spiritual significance of the place, named the pasture Lang-sisa, which translates from the local dialect to “The Place Where the Ox Died.”

To honor the animal, the lama erected a large stone marker at the site. Today, trekkers can still find a prominent, historic rock structure in the pasture decorated with white prayer flags, which locals believe marks the final resting place of the legendary red ox. This myth adds an aura of ancient mysticism to the landscape, reminding travelers that they are walking through a valley deeply revered by its inhabitants.

Trail Description: Kyanjin Gompa to Langsisha Kharka

The journey to Langsisha Kharka is most commonly executed as a long, full-day side excursion from Kyanjin Gompa.

Quick Route Facts

  • Starting/Ending Point: Kyanjin Gompa (3,870m / 12,697ft)

  • Maximum Elevation: Langsisha Kharka (4,160m / 13,648ft)

  • Total Round-Trip Distance: Approximately 24 kilometers (15 miles)

  • Time Required: 8 to 10 hours round-trip (depending on your pace and fitness)

  • Terrain: Glacial valley floor, rocky paths, loose scree, sandy riverbeds, and open pastures.

Phase 1: Leaving Kyanjin Gompa and Entering the Upper Valley

The hike begins early in the morning from Kyanjin Gompa. Leaving the teahouses and the iconic local cheese factory behind, you head due east, following the wide, flat trail that runs parallel to the north bank of the Langtang Khola.

The initial stretch of the trail is incredibly pleasant. The valley floor here is wide and U-shaped—a classic textbook indicator of past glacial carving. As you walk, the massive bulk of Tserko Ri rises sharply to your left (north), while across the river to your right (south), the jagged ridges of Naya Kanga (5,844m) and Ganchenpo dominate the skyline.

The path passes through sparse vegetation, consisting mostly of low-lying juniper bushes, alpine shrubs, and hardy wildflowers if you are trekking in the spring. You will cross several small streams fed by the melting snows from the ridges above via simple wooden logs or stepping stones.

Phase 2: The Settlement of Numthang

After approximately 2 to 3 hours of steady walking, the trail brings you to Numthang (approx. 3,940m). Numthang is another seasonal herding settlement consisting of a few stone huts and walled pastures used to corral yaks overnight.

Numthang serves as an excellent spot to take a short break, hydrate, and enjoy a packed snack. The views from here open up dramatically toward the head of the valley. You can clearly see the distinct cone shape of Langshisha Ri standing sentinel in the distance. The trail beyond Numthang becomes noticeably wilder and more rugged, as the well-trodden paths start to give way to loose stones and glacial debris.

Phase 3: Navigating the Glacial Moraine and Debris

Leaving Numthang, the terrain transitions from flat, grassy plains to a more challenging landscape. You will need to navigate sections of lateral moraines—massive ridges of rock and soil pushed aside by ancient glaciers.

The trail here rises and falls gently as it crosses old landslide zones and boulder fields. Keeping a sharp eye out for stone cairns (small stacks of rocks left by herders and guides) is essential through this section, as the actual path can easily become obscured by shifting stones.

As you approach the confluence where the Langtang valley splits, you will cross areas of sandy riverbeds. Here, the Langtang Khola braids into multiple smaller streams rushing through the gravelly valley floor. The air becomes noticeably crisper and cooler as you draw closer to the massive ice sheets ahead.

Phase 4: Arrival at the Amphitheater of Langsisha Kharka

After 4 to 5 hours of trekking from Kyanjin Gompa, the valley opens up into the breathtaking expanse of Langsisha Kharka.

The arrival is nothing short of spectacular. You find yourself standing in a massive, flat, alpine meadow surrounded by a colossal amphitheater of snow, ice, and rock. The vertical walls of the surrounding mountains rise thousands of meters directly from the valley floor.

   [Langshisha Ri] (6,427m)          [Dorje Lhakpa] (6,966m)
         \                                  /
          \                                /
    ───────┴──────────────────────────────┴───────
         [ LANGSISHA KHARKA AMPHITHEATER ] (4,160m)
    ──────────────────────────────────────────────
                          ▲
                          │
                  (Trail from Numthang)

Take your time to explore the pasture. Locate the historic stone marker associated with the legend of the red ox, sit by the rushing glacial streams, and marvel at the towering summit of Langshisha Ri (6,427m) shooting into the sky directly to the north. To the southeast, the massive wall of Dorje Lhakpa displays its cascading icefalls and hanging glaciers.

Phase 5: The Return Journey to Kyanjin Gompa

Because there are no permanent tea houses or commercial lodges at Langsisha Kharka, you must turn around and retrace your steps back to Kyanjin Gompa for the evening.

While the return journey is predominantly downhill (dropping about 290 meters over 12 kilometers), do not underestimate it. After a long morning of walking at high altitude, fatigue can set in quickly. The rocky moraine sections require careful foot placement to avoid twisted ankles. Ensure you leave Langsisha Kharka no later than 1:00 PM or 2:00 PM to ensure you return to the comfort of your teahouse in Kyanjin Gompa well before sunset.

Complete 8-Day Langtang Valley & Langsisha Kharka Itinerary

To experience Langsisha Kharka safely and comfortably, it must be integrated into a well-structured itinerary that prioritizes gradual acclimatization. Below is a highly optimized, SEO-friendly 8-day itinerary starting and ending in Kathmandu.

Day Route Breakdown Distance Trekking Hours Target Elevation
Day 01 Drive from Kathmandu to Syabrubesi 110 km 6–7 hours drive 1,550 m / 5,085 ft
Day 02 Trek from Syabrubesi to Lama Hotel 12 km 5–6 hours 2,470 m / 8,104 ft
Day 03 Trek from Lama Hotel to Mundu (via Langtang Village) 12.5 km 6–7 hours 3,550 m / 11,647 ft
Day 04 Trek from Mundu to Kyanjin Gompa 6 km 3–4 hours 3,870 m / 12,697 ft
Day 05 Full-Day Excursion to Langsisha Kharka & return 24 km 8–10 hours 4,160 m / 13,648 ft
Day 06 Trek from Kyanjin Gompa back to Lama Hotel 18 km 6–7 hours 2,470 m / 8,104 ft
Day 07 Trek from Lama Hotel back to Syabrubesi 11 km 4–5 hours 1,550 m / 5,085 ft
Day 08 Drive from Syabrubesi back to Kathmandu 110 km 6–7 hours drive 1,400 m / 4,593 ft

Detailed Day-by-Day Breakdown

Day 01: Kathmandu to Syabrubesi (Drive)

  • Elevation Gain: +150 m (Starting from Kathmandu at 1,400m)

  • Highlights: Scenic mountain roads, views of Ganesh Himal, and crossing the Trishuli River.

Your journey begins with a drive out of the Kathmandu Valley. The route takes you along the winding mountain highways heading north, passing through historic towns like Trishuli Bazar and Dhunche. As you enter the Rasuwa District, you will pass through official checkpoints for the Langtang National Park. The drive offers glimpses of terraced farms, cascading waterfalls, and the distant, snow-capped peaks of the Ganesh Himal range. You overnight at Syabrubesi, a bustling trailhead town situated alongside the Bhote Koshi River.

Day 02: Syabrubesi to Lama Hotel

  • Elevation Gain: +920 m

  • Highlights: Walking along Langtang Khola, dense oak and rhododendron forests, suspension bridges.

This is your first official day on the trail. Leaving Syabrubesi, you cross a steel suspension bridge over the Bhote Koshi and follow the trail winding along the banks of the Langtang Khola. The path enters a dense, lush jungle canopy filled with oak, maple, bamboo, and rhododendron trees. This stretch of forest is a protected wildlife habitat; keep an eye out for gray langur monkeys, wild boars, and a vast array of colorful Himalayan birds. You will pass through small trailside settlements like Pairo and Bamboo before making a final, steep climb through the trees to reach Lama Hotel.

Day 03: Lama Hotel to Mundu via Langtang Village

  • Elevation Gain: +1,080 m

  • Highlights: Emerging above the tree line, dramatic views of Langtang Lirung, passing the memorial chorten at the new Langtang Village.

The trail continues its steady ascent through the river valley. As you gain altitude, the dense forest begins to thin, opening up into wider glacial terrain. After a steady climb of 3 to 4 hours, you reach Ghoda Tabela (3,020m), an ancient military outpost where the first clear, front-row views of Langtang Lirung (7,227m) reveal themselves.

Continuing upward, you pass traditional Tamang settlements, extensive prayer wheels, and long Mani walls carved with sacred Buddhist mantras. You will walk past the site of the old Langtang Village, which was tragically destroyed in the 2015 earthquake, and pass through the resilient new village constructed nearby. You spend the night at Mundu, a slightly higher, peaceful settlement that sets you up perfectly for a short walk the next morning.

Day 04: Mundu to Kyanjin Gompa

  • Elevation Gain: +320 m

  • Highlights: Massive Buddhist Mani walls, panoramic mountain amphitheater, visiting the ancient Kyanjin Monastery, and the yak cheese factory.

This is a shorter trekking day, designed intentionally to allow your body to adapt to the thin air above 3,500 meters. The trail from Mundu climbs gradually past high pasturelands and massive stone Mani structures. As you round a final bend in the valley floor, the stunning settlement of Kyanjin Gompa comes into view, nestled beneath the towering icefall walls of Langtang Lirung and Kimshung.

Arriving by lunchtime gives you a full afternoon to rest and explore. You can visit the historic Kyanjin Monastery, sample fresh yak cheese at the famous local government-supported factory, or take a gentle acclimatization walk up the lower ridges of Kyanjin Ri to watch the sunset over the valley.

Day 05: The Big Day – Kyanjin Gompa to Langsisha Kharka and Back

  • Elevation Gain/Loss: +290 m / -290 m (Peak altitude reached: 4,160m)

  • Highlights: Deep wilderness exploration, absolute solitude, unmatched views of Langshisha Ri and Dorje Lhakpa, and seeing the legendary stone.

This is the absolute highlight of your trek. You will wake up before dawn, pack a daypack with plenty of water, a hearty packed lunch, and warm layers, and head east into the uninhabited upper valley. Follow the trail description outlined in the previous section, taking time to savor the incredible peace of Numthang and the wild, raw beauty of the Langsisha pasture.

Spend an hour soaking in the immense glacial amphitheater at the Kharka, photographing the ice walls of Dorje Lhakpa, before turning back around. You will reach your cozy teahouse in Kyanjin Gompa by late afternoon, exhausted but deeply rewarded by one of the finest wilderness walks the Himalayas have to offer.

Day 06: Kyanjin Gompa to Lama Hotel

  • Elevation Loss: -1,400 m

  • Highlights: Long, easy descent, retracing steps through changing ecological zones, celebratory evening.

After the strenuous efforts of the previous day, your return journey begins. Because you are heading entirely downhill, your body will feel an incredible surge of energy as you descend into thicker, oxygen-rich air. You retrace your steps along the valley floor, passing back through Mundu, Langtang Village, and Ghoda Tabela. The rocky, high-altitude landscape quickly gives way once more to the comforting embrace of the green oak and rhododendron forests. You spend the night back at Lama Hotel.

Day 07: Lama Hotel to Syabrubesi

  • Elevation Loss: -920 m

  • Highlights: Final sights of the Langtang Khola, crossing majestic suspension bridges, and completing the loop.

Your final day of walking is a short, pleasant 4 to 5-hour descent back down to the trailhead. You follow the cascading waters of the Langtang Khola, enjoying the warmth of the lower altitude. Arriving back in Syabrubesi by early afternoon, you can finally enjoy a hot shower, toast a successful trek with your guide and porters, and rest your legs.

Day 08: Syabrubesi back to Kathmandu (Drive)

  • Elevation Loss: -150 m

  • Highlights: Final mountain views, returning to the vibrant energy of Kathmandu.

You board your private vehicle or local bus for the drive back to Kathmandu. As you wind along the mountain ridges and descend back into the capital city, you can look back toward the northern horizon, knowing you ventured far beyond the standard tourist trail into the deep, sacred wilderness of Langsisha.

Trekking Difficulty, Elevation Profile, and Safety Tips

Understanding the Difficulty Level

The standard Langtang Valley Trek is generally classified as a moderate trek, making it highly accessible to first-time trekkers and families with decent fitness. However, adding the full-day excursion to Langsisha Kharka increases the overall difficulty rating to moderate-challenging.

Nepal Trekking Routes

The challenge does not stem from technical climbing; rather, it is a matter of endurance and altitude. Walking 24 kilometers in a single day on rugged, rocky, unpaved terrain at an elevation consistently above 3,900 meters is physically taxing. It requires strong cardiovascular endurance, stable ankles, and mental resilience.

Elevation Profile & Acclimatization

Acclimatization is the single most critical factor for a safe trip. On this itinerary, you start at 1,550 meters and reach 4,160 meters within four days. To minimize the risk of Acute Mountain Sickness (AMS), keep these guidelines in mind:

  • The Golden Rule: Never rush your pace. Walk slowly and steadily (Bistari, Bistari in Nepali), keeping your heart rate stable.

    Best Heritage Tour
  • Hydration: Drink between 3 to 4 liters of water daily. The dry, high-altitude air dehydrates your body rapidly, accelerating the onset of altitude headaches.

    Best Heritage Tour
  • Incorporate the Acclimatization Day: Do not attempt to hike to Langsisha Kharka directly upon arriving from the lower villages. Ensure you have spent at least one full night at Kyanjin Gompa first.

  • Know the Symptoms: Familiarize yourself with early signs of AMS, including persistent headaches, dizziness, loss of appetite, nausea, and insomnia. If symptoms progress from mild to severe, the only solution is immediate descent to a lower altitude.

Best Seasons to Visit Langsisha Kharka

To experience the upper Langtang Valley in all its glory, timing your trek with the ideal weather windows is paramount. The region experiences two distinct peak trekking seasons.

[SPRING] Mar - May : Wildflowers, Melting Snow, Active Herders
[AUTUMN] Sep - Nov : Crystal Clear Skies, Stable Weather, Perfect Photography

1. The Autumn Season (September to November)

Autumn is universally considered the gold-standard season for trekking to Langsisha Kharka. Following the departure of the summer monsoon rains, the atmosphere is cleared of dust and haze, resulting in spectacularly sharp, crystal-clear panoramic views. Weather conditions are highly stable, with blue skies dominating the daytime. While temperatures drop significantly below freezing during the nights at Kyanjin Gompa, daytime walking conditions are absolutely perfect.

2. The Spring Season (March to May)

Spring is an equally magnificent time to visit, especially for nature lovers. The lower trails from Syabrubesi up to Ghoda Tabela burst into a vibrant display of colors as the rhododendron and orchid forests come into full bloom. As you move into the upper valley toward Langsisha, the winter snows are actively melting, filling the glacial rivers to their brims. This is also the time when herders begin moving their yak herds back up to the high pastures, allowing you to witness the living pastoral culture firsthand.

The Off-Peak Seasons (Winter and Monsoon)

  • The Monsoon (June to August): Heavy rains bring risks of landslides along the mountain driving routes, mud on the trails, and heavy cloud cover that completely obscures the mountain peaks. Leeches are prevalent in the forested zones.

  • The Winter (December to February): Extreme cold settles into the upper valley. Heavy snowfall can completely block the trail from Kyanjin Gompa to Langsisha Kharka, making navigation dangerous without specialized winter gear and wilderness navigation skills. Most seasonal herding huts are entirely abandoned during these months.

    Haven Holidays Nepal

Required Permits and Logistics

Because Langsisha Kharka is situated within a protected national park and a border district, you must secure two distinct permits before starting your trek. These can be easily obtained at the official Department of Tourism counter in Kathmandu or directly at the park entry checkpoints along the drive to Dhunche.

1. Langtang National Park Entry Permit

This permit grants you legal access to the protected park boundaries. The funds generated go directly toward environmental conservation and community development initiatives within the park.

  • Cost for Foreign Nationals: NPR 3,000 per person (approx. USD $23–$25)

  • Cost for SAARC Nationals: NPR 1,500 per person

2. TIMS Card (Trekking Information Management System)

The TIMS card is a mandatory tracking permit implemented by the Nepal Tourism Board and the Trekking Agencies Association of Nepal (TAAN) to ensure the safety and security of trekkers across the country.

Himalayan Recreation
  • Cost: NPR 2,000 per person (approx. USD $15–$17)

Important Regulatory Note: Nepal updates its independent trekking regulations regularly. It is highly recommended to engage a licensed local guide through an authorized trekking agency. A professional guide ensures seamless navigation through the trail’s remote moraine sections and acts as a vital safety asset in high-altitude environments.

What to Pack for the Langsisha Excursion

Since the journey to Langsisha Kharka is executed as a long day-hike away from established teahouses, packing a well-curated daypack is essential. While your heavy duffel bag can stay safely at your lodge in Kyanjin Gompa, ensure your daypack contains the following items:

Essential Gear & Clothing Layers

  • Insulated Layer: A high-quality down jacket or thick fleece. The wind sweeping off the Langsisha Glacier can cause temperatures to plummet instantly when you stop moving.

  • Windproof/Waterproof Shell: A breathable jacket to protect against unexpected alpine showers or biting valley winds.

  • Sturdy Trekking Boots: Ankle-supportive, broken-in hiking boots with deep tread are non-negotiable for navigating loose moraine stones and boulder fields.

  • Trekking Poles: Highly recommended to reduce the impact on your knees during the long 24km round-trip and provide stability on uneven ground.

Hydration and Sustenance

  • Water Purification: Two 1-liter water bottles equipped with purification tablets or an integrated filtration system. Avoid buying single-use plastic water bottles in the national park to protect the environment.

  • Packed Lunch and Snacks: Request your teahouse host in Kyanjin Gompa to prepare a packed lunch (such as fried rice, boiled eggs, or Tibetan bread) the night before. Pack extra high-energy snacks like energy bars, nuts, chocolates, and electrolyte powders.

Miscellaneous Protection

  • Sun Protection: High-SPF sunscreen, polarized sunglasses, and a wide-brimmed hat. UV radiation increases significantly at high altitudes.

  • Navigation/Illumination: A reliable headlamp with extra batteries (in case your return journey extends past dusk) and a basic map or offline GPS route loaded on your phone.

Practical Comparison: Tserko Ri vs. Langsisha Kharka

langsisha-kharka

If your time in Kyanjin Gompa is limited to a single acclimatization day, you might find yourself choosing between the climb up to Tserko Ri or the wilderness walk to Langsisha Kharka. Both are phenomenal options, but they cater to very different preferences. Use the comparison table below to decide which adventure aligns best with your trekking style:

Feature Tserko Ri (4,984m) Langsisha Kharka (4,160m)
Primary Appeal Aerial, 360-degree panoramic summit views Deep wilderness, glacial valleys, and isolation
Terrain Style Steep, vertical, grueling uphill switchbacks Long, gradual, relatively flat valley walk
Crowd Levels High (Most popular day-hike in the region) Extremely Low (Very pristine and untouched)
Physical Demands High cardiovascular strain from rapid ascent High muscular endurance strain from long-distance
Cultural Value Peak prayer flags and geographic scale Active yak pastures and deep local folklore
Glacier Closeness Visual overview from an elevated distance Direct physical proximity to the glacier terminus

Frequently Asked Questions (FAQs) about Langsisha Kharka

1. Can I stay overnight at Langsisha Kharka?

There are no commercial teahouses, lodges, or hotels at Langsisha Kharka. The area consists entirely of seasonal stone huts used by herders. If you wish to stay overnight, you must organize a fully self-sustained camping expedition complete with tents, sleeping pads, a kitchen crew, and all necessary food supplies. Otherwise, it must be completed as a day-hike returning to Kyanjin Gompa.

2. Is there mobile network coverage or Wi-Fi at Langsisha Kharka?

No. While you can occasionally find weak mobile network signals (Ncell/Nepal Telecom) or paid satellite Wi-Fi services in the main hub of Kyanjin Gompa, all connectivity drops completely within an hour of walking eastward toward Langsisha. Prepare to be entirely offline during this excursion.

3. Can a beginner trekker complete the walk to Langsisha Kharka?

Yes, provided they possess a solid baseline of physical fitness and have spent a minimum of 24 to 48 hours acclimatizing at the altitude of Kyanjin Gompa. The trail itself is not technically demanding or steep, but the sheer distance (24km round-trip) requires good stamina.

Haven Holidays Nepal

4. Are there any water sources along the trail?

You will walk alongside the Langtang Khola and pass numerous freshwater glacial streams. However, you should never drink unpurified water directly from the trail, as upstream pasturelands are used by livestock. Always use water purification tablets or a portable filtration device.

5. What should I do if it starts snowing while I am at the Kharka?

Weather patterns in the high Himalayas can shift rapidly during the afternoon. If clouds begin to build or light snow starts to fall, do not linger at the pasture. Immediately begin your return journey toward Kyanjin Gompa. The trail through the moraine sections can become hazardous and difficult to navigate if covered in fresh snow.

Conclusion: Venture Beyond the Ordinary

The Langtang Valley Trek is undeniably an incredible adventure, but extending your journey past the classic boundary of Kyanjin Gompa into the wilderness of Langsisha Kharka transforms a great trek into an extraordinary, deeply personal journey.

It is a place where nature presents itself in its rawest, most unfiltered form—unspoiled by commercialization, wrapped in ancient folklore, and guarded by an amphitheater of eternal ice. As you stand by the historic red ox monument, surrounded by towering peaks and the vast silence of the upper valley, you will realize that the true spirit of the Himalayas is always found just a little further down the trail.

Pack your bags, respect the local culture, leave no trace behind, and prepare to discover one of the finest hidden frontiers that Nepal has to offer!

Lobuche Peak Climbing: Complete Guide, Cost, Difficulty, Itinerary & Preparation(2026)

Lobuche Peak Climbing is one of the most rewarding high-altitude adventures in Nepal, combining technical mountaineering, Himalayan trekking, and breathtaking views of Everest. There’s a moment somewhere above 5,500 meters where your brain stops arguing with your legs and everything just gets quiet. You’re not thinking about work or your phone or whatever was stressing you out back home. You’re just walking. Breathing. Putting one crampon in front of the other on a frozen slope at 3 am while Everest sits in the dark above you like it’s been waiting.

That’s Lobuche East. And no, I’m not overselling it.

At 6,119 meters, Lobuche East is one of the most satisfying climbs you can do in Nepal without needing a lifetime of mountaineering experience. It’s technical enough to feel real — fixed ropes, crampons, an ice axe, a proper summit push in the cold. But it’s not so far beyond reach that a fit, determined, well-prepared person can’t stand on top of it. Thousands of people do every year.

Most of them are regular people who trained hard and took it seriously.

This guide is everything I wish someone had handed me before I started planning. Cost, permits, how hard it actually is, what the itinerary looks like, and how to get your body ready without losing your mind in the process.

Quick Facts

Detail Info
Location Khumbu Region, Sagarmatha National Park, Nepal
Summit Height 6,119 m / 20,075 ft (Lobuche East)
Trip Duration 16 to 18 days from Kathmandu
Difficulty Moderate to Challenging
Best Seasons March to May and September to November
Permits Required NMA Permit, Sagarmatha National Park, Khumbu Municipality

What Is Lobuche Peak?

lobuche-peak

Lobuche is technically two peaks.

There’s Lobuche West at 6,145 meters — rarely climbed, genuinely technical, not what most people mean when they say “Lobuche.”

And then there’s Lobuche East at 6,119 meters, which is on Nepal’s official trekking peaks list and the one this entire guide is about.

It’s located inside Sagarmatha National Park, about 10 kilometers from Everest Base Camp. Close enough that you’ll pass within sight of EBC on the standard itinerary. Some people do both. Honestly, if you’ve already come that far, you probably should.

The reason people choose Lobuche over other trekking peaks in Nepal is the combination of things it gives you. Real mountaineering technique — not just walking at altitude but actual climbing with gear. A route through the most iconic trekking valley in the world. And a summit view that puts Everest, Lhotse, Nuptse, Ama Dablam, and the full sweep of the Khumbu Glacier directly in front of you.

On a clear morning in October, that view does something to people. It’s hard to describe without sounding dramatic so I’ll just say: bring more memory cards than you think you need.

Okay, But How Hard Is It Really?

This is the question everyone asks, and nobody answers honestly enough.

Here’s the truth.

The trekking portion is genuinely demanding. You’re walking six to eight hours a day, often uphill, at elevations where your body is quietly running on reduced oxygen the entire time. Things feel harder than they should. A gentle slope at 4,800 meters feels like a hill you’d normally jog up. That’s not a fitness failure, that’s just altitude.

The climbing portion above base camp is where it gets technical. Steep fixed rope sections on rock and mixed terrain, an exposed ridge, and a final snow push to the summit before sunrise. You need to know how to use crampons and an ice axe — your guide will run a session at base camp, but it helps enormously if you’ve touched that gear at least once before arriving.

Where people struggle isn’t always the technical parts. It’s the summit day cumulative exhaustion — two weeks of altitude living, cold nights in teahouses, big days on your legs — and then being asked to wake up at 2 am and climb in the dark.

Your body is tired before you even start.

The people who make the summit are usually the ones who respect the acclimatization schedule and show up physically prepared.

How Lobuche Compares to Other Trekking Peaks

Peak Height Difficulty What You Actually Need
Island Peak 6,189 m Moderate Basic crampon use
Lobuche East 6,119 m Moderate to Hard Crampons, ice axe, rope work
Mera Peak 6,476 m Moderate Mostly glacier terrain
Pisang Peak 6,091 m Hard More exposed and technical

Never done a trekking peak before?

Island Peak or Mera first.

Done one of those and survived?

Lobuche is the next logical step.

When to Go

Spring (March to May)

Spring is the main season. Stable weather, longer summit windows, warmer than you’d expect on the approach. The NMA permit costs USD 300 in spring, which is more than in other seasons. There’s a reason for that. Conditions in April and early May are often exceptional.

Autumn (September to November)

Autumn is what a lot of experienced Himalayan trekkers actually prefer. The monsoon clears everything out — air is clean, skies are sharp, the views are ridiculous. Trails are slightly quieter than in the spring. NMA permit drops to USD 175. If your schedule allows it, October is a special time to be in the Khumbu.

Winter

Winter is cold in a way that’s hard to fully communicate until you’ve experienced it. High camp temperatures can hit minus 25 or lower. Some teams do it. Most don’t. If you’re even asking about winter climbing, you probably already know whether you’re prepared for it.

Monsoon (June to August)

Just don’t.

Serious snowfall, visibility that makes summit attempts essentially impossible, and conditions on the upper mountain that reputable operators won’t take clients into.

This isn’t being overly cautious; it’s just what the mountain is like in those months.

The Route

You fly into Lukla from Kathmandu — 35 minutes, mountain airstrip, dramatic landing. Everyone talks about the Lukla airport. It’s fine. You’ll probably still grip the armrest. From Lukla, the route follows the Everest Base Camp trail all the way through the valley.

Phakding

Phakding on the first day.

Namche Bazaar

Then the long climb up to Namche Bazaar, where you’ll spend two nights acclimatizing. Namche is a proper mountain town — good food, gear shops, a bakery that becomes surprisingly important after a few days on the trail.

Tengboche

From Namche, you continue through Tengboche, past the monastery that every Nepal trekking photo seems to include.

Dingboche

Then to Dingboche, where another acclimatization day happens. These rest days feel boring when you’re doing them, and essential when you look back.

Lobuche Village

Lobuche village sits at around 4,940 meters and is where the character of the trip starts shifting. The landscape gets starker. Teahouses get simpler. Everest appears in the distance.

Base Camp and High Camp

From the village, you move to Base Camp, do crampon training, then push up to High Camp for one night before the summit attempt.

The summit push starts before 3 am. Cold, dark, headlamp on, ice axe in hand. The fixed ropes guide you through the technical sections. By the time you reach the summit ridge, the sun is usually beginning to touch Everest. That moment is the whole point.

Itinerary — 16 to 18 Days

Day 1

Arrive Kathmandu, team briefing, gear check

Day 2

Fly to Lukla (2,840 m), trek to Phakding (2,610 m)

Day 3

Trek to Namche Bazaar (3,440 m)

Days 4 and 5

Acclimatization in Namche, short hikes up, sleep down

Day 6

Trek to Tengboche (3,860 m), visit the monastery

Day 7

Trek to Dingboche (4,360 m)

Day 8

Rest day in Dingboche. Read a book. Your lungs are busy.

Day 9

Trek to Lobuche village (4,940 m)

Day 10

Excursion to Everest Base Camp. You’re already there. Go.

Day 11

Kala Patthar at sunrise (5,550 m). The best Everest view you can get on foot.

Day 12

Move to Lobuche Base Camp, crampon and rope training

Day 13

Climb to High Camp (5,600 m), rest in the afternoon

Day 14

Summit day. Up at 2 am, summit Lobuche East (6,119 m), descend

Days 15 to 17

Return trek to Lukla

Day 18

Fly to Kathmandu. Hot shower. Proper meal. Tell everyone.

What Does Lobuche Peak Climbing Cost?

Packages from licensed Nepal operators run roughly USD 2,000 to USD 3,500 per person for a group expedition.

Solo expeditions cost more — usually USD 2,500 to USD 4,000, depending on the company and what’s actually included.

That price gap between operators is not random.

A USD 1,900 package that doesn’t cover domestic flights, high camp accommodation, or gear rental will cost you more in the end than a USD 2,800 package that covers everything.

Always read the inclusions before you compare numbers.

Rough Cost Breakdown

What Approx. Cost
Group expedition package USD 2,000 to USD 3,500
NMA climbing permit (spring) USD 300
NMA climbing permit (autumn) USD 175
Sagarmatha National Park permit USD 22 to 30
Khumbu Municipality permit USD 20 to 22
Kathmandu to Lukla flights (return) USD 450
Gear rental USD 100 to 300
Guide and porter tips USD 100 to 200

A solid package covers airport transfers, teahouse accommodation the whole way, all meals, a certified climbing guide, porter support, all three permits, and a tented camp at base camp and high camp.

If the listing you’re looking at doesn’t mention permits or high camp, ask specifically.

Permits — What You Need and What It Costs

Three permits. All mandatory. No exceptions.

Nepal Mountaineering Association (NMA) Climbing Permit

This is the main one. Your agency applies on your behalf; you can’t do it alone. USD 300 in spring, USD 175 in autumn and winter.

Sagarmatha National Park Entry Permit

Everyone entering the Khumbu region needs this. Around USD 22 to 30 for foreign nationals.

Khumbu Pasang Lhamu Municipality Permit

Local government requirement. Roughly USD 20 to 22 per person. All three should be included in your package cost. Get that confirmed in writing.

How to Actually Prepare Your Body

Start four months out if you can. Three months minimum. Running is the foundation. Not casual jogging — real running, with effort, four or five days a week. Build up to sessions over an hour. You are preparing for consecutive days of six to eight hours of uphill walking at altitude, and the only way your cardiovascular system gets ready for that is by being stressed repeatedly before the trip.

Strength Training

Legs and core are next. Weighted squats, lunges, step-ups with a loaded pack. Pay special attention to your quads. The descent from high camp on tired legs is steep and technical, and that’s where injuries happen to people who have only trained on flat ground.

Pack Training

Once a week, go out with a 10 to 15 kilogram pack for a long hike. Three hours minimum. This isn’t about suffering — it’s about teaching your body what the approach days feel like so they don’t come as a shock at 4,500 meters.

Diamox

Talk to your doctor about Diamox before you leave. Most climbers in the Khumbu use it as a preventive measure, and it genuinely helps.

Altitude Sickness — Take This Part Seriously

Mild symptoms above 3,500 meters are normal. Headache, bad sleep, reduced appetite, feeling a bit flat. Your body is adjusting. That’s expected.

Warning Signs

What’s not normal:

  • A headache that keeps worsening even after rest
  • Confusion
  • Loss of coordination
  • Breathlessness while sitting still
  • Any chest symptoms

These mean descend now, not in the morning, not after one more sleep — now. The acclimatization days in Namche and Dingboche are not optional rest days that confident people skip. They’re the mechanism that keeps you alive and functional on summit day. Trekkers who rush the schedule because they feel fine are statistically the ones who end up turning back early or getting evacuated. The mountain doesn’t reward impatience. Your Sherpa guide has seen altitude illness more times than you want to think about. If they say you’re not going up, you’re not going up.

Lobuche vs Island Peak vs Mera Peak

Feature Lobuche East Island Peak Mera Peak
Height 6,119 m 6,189 m 6,476 m
Difficulty Moderate to Hard Moderate Moderate
Technical Skills Yes — ropes and ice axe Basic crampons only Minimal
Best For Those ready for a real climb First-time peak baggers High altitude without technicality

There’s no wrong choice here — just the right mountain for where you are right now.

Frequently Asked Questions (FAQ)

Is Lobuche harder than Island Peak?

Yes, noticeably. The fixed rope sections and summit ridge on Lobuche are a step up from anything Island Peak asks of you.

How many days does the full trip take?

16 to 18 days from Kathmandu. Don’t try to compress it.

What’s the summit success rate?

On well-organised expeditions with proper acclimatisation, around 70 to 80 percent. Weather and fitness are the two variables that move that number up or down.

Can someone with no climbing experience do this?

A strong trekker with serious high-altitude experience and months of preparation — possibly. Someone who’s never been above 4,000 meters — not yet. Do EBC or Island Peak first.

What permits do I need?

NMA climbing permit, Sagarmatha National Park permit, and Khumbu Municipality permit. All three are mandatory.

Final Thought

Lobuche East will ask more of you than most things in your life ask of you. The preparation takes months. The days are long and cold and sometimes miserable. The summit push in the dark is genuinely hard. And then you’re standing on top of it. Everest right there. The sun is coming up. Everything quiet. Worth it doesn’t cover it.

Lapchi Valley Trek 2026: Nepal’s Hidden Spiritual Sanctuary in the Himalayas

Nestled in the remote northernmost fringes of Nepal’s Dolakha District, pinned directly against the jagged, windswept border of Tibet, lies a landscape forgotten by the modern world. Lapchi Valley (also spelled Lapche) remains one of the least explored yet most spiritually significant destinations in the entire Himalayan chain. While Nepal is world-famous for commercial trekking hubs such as Everest Base Camp, the Annapurna Circuit, and Langtang, Lapchi offers an entirely different realm of experience—one that seamlessly fuses raw mountain wilderness, ancient Vajrayana Buddhist heritage, sacred caves, and a profound, indestructible aura of spiritual tranquility.

For centuries, Lapchi has been revered by Buddhist practitioners as a living mandala. In esoteric geography, it is recognized as the “Speech Mandala” of the deity Chakrasamvara (with Mount Kailash representing the Body Mandala and Mount Tsari representing the Mind Mandala). Together, these three peaks constitute the most powerful sacred mountains of the earthly realm. Lapchi is also the legendary wilderness where the 11th-century yogi, poet, and saint Jetsun Milarepa spent years in profound meditation, leaving behind a legacy of miracles, footprints pressed into solid stone, and an enduring spiritual energy.

Unlike heavily commercialized routes, Lapchi remains relatively isolated. Visitors who journey into this hidden valley encounter pristine cloud forests, alpine meadows, dramatic vertical river gorges, and centuries-old monasteries largely untouched by mass tourism. The result is an authentic Himalayan expedition that offers both rigorous physical adventure and deep inner reflection.

Where is the Lapchi Valley Located?

lapchi-valley

Lapchi Valley is situated in the northern part of Nepal within the Gaurishankar Conservation Area (GCA) in the Dolakha District of Bagmati Province. The valley is positioned directly on the boundary separating Nepal from the Tibet Autonomous Region of China.

                       [ Mount Kailash ] -> Body Mandala (Tibet)
                               |
                       [ Lapchi Valley ] -> Speech Mandala (Nepal-Tibet Border)
                               |
                       [  Mount Tsari  ] -> Mind Mandala (Tibet/India)

The area is hemmed in by towering snow-capped peaks, deep river canyons, and dense mountain forests. Due to its remote location and sensitive border geography, Lapchi has remained largely inaccessible compared to Nepal’s mainstream destinations. The valley floor sits at an elevation of approximately 3,670 meters (12,040 feet), with surrounding trekking routes, sacred caves, and high alpine pastures frequently reaching above 4,600 to 4,900 meters. This rugged, vertical terrain, combined with minimal modern infrastructure, reinforces its reputation as a true off-the-beaten-path sanctuary.

The Legacy of Jetsun Milarepa: Redemption and Realization

lapchi-valley

The history and identity of Lapchi are irrevocably intertwined with the life of Jetsun Milarepa (c. 1052–c. 1135 CE). His life story remains one of the most powerful narratives of transformation, moving from a practitioner of black magic who destroyed his relatives’ home to a completely enlightened master.

From Sorcery to the Cotton Robe

After seeking out the fierce translator Marpa, who subjected him to years of brutal physical and mental trials to purify his negative karma, Milarepa was initiated into the lineages of Mahamudra and the Six Yogas of Naropa. Marpa explicitly commanded his disciple to shun human settlements and spend his life meditating in the wild, uninhabited caves of the high Himalayas, prophesying that Lapchi Kang would become an extraordinary site for his practice.

Subjugating the Spirits of Lapchi

According to translations from The Hundred Thousand Songs of Milarepa, when the yogi first arrived in the Lapchi wilderness, the region was governed by fierce local deities and nature spirits hostile to the introduction of Buddhism. Milarepa engaged in intense spiritual warfare with these forces, ultimately subjugating them through compassion and cosmic insight. Instead of destroying them, he transformed these elemental entities into protectors of the Dharma (Dharmapalas). Milarepa lived as a hermit here, wearing nothing but a thin white cotton robe (repa) even in sub-zero alpine winters, surviving primarily on wild nettle soup, which legend states turned his skin a distinct green hue.

The Sacred Topography: The Caves of Lapchi

lapchi-valley lapchi-valley

While there are dozens of smaller meditation cells scattered across the ridges of Lapchi, twelve distinct caves are recognized as major sites of Milarepa’s practice. Several of these sites can be visited by intrepid pilgrims and trekkers today.

1. Rechen Phug (The Great Radiant Cave)

Located close to the main valley floor, Rechen Phug is one of the largest caves in the region. Long before formal monasteries were constructed, this cave served as the communal assembly hall for wandering yogis.

  • The Handprint Miracle: Inside Rechen Phug, visitors can see a smooth impression in the solid rock. Legend holds that when the ceiling of the cave began to collapse, Milarepa used his bare hand to push the giant boulder back into place, leaving his handprint permanently etched into the stone.

2. Dudul Phug (The Cave of Demon Subjugation)

Situated near the confluence of the roaring glacial rivers below the main village, Dudul Phug is the site where Milarepa famously wrestled with the elemental spirits of the mountain. The cave is humble and narrow, forcing visitors to crouch, mirroring the physical asceticism required of the ancient hermits.

3. Ze Phug (The Crest Cave)

Perched higher up the mountain slopes, Ze Phug is associated with Milarepa’s mastery over the physical elements. Near this cave sits a holy water spring. According to local oral histories, when Milarepa’s disciples grew exhausted from carrying water up the steep, rocky ridges, the master struck his wooden staff into the solid rock face, causing a crystal-clear stream to bubble forth.

4. Sephuk Cave (The Highest Hermitage)

Sitting at a daunting 4,600 meters (15,091 feet) above sea level, Sephuk Cave rests on a sheer cliff face overlooking the entire valley. Sephuk was Milarepa’s final sanctuary in Lapchi, where his practice reached its absolute zenith. The path to Sephuk is steep and narrow, and traditional pilgrims often undertake the grueling multi-hour ascent from the valley floor in complete silence or while fasting.

lapchi-valley

Monasteries and Sacred Monuments

lapchi-valley

While the caves represent the raw, ascetic heart of Lapchi, the institutional and communal anchor of the valley is its monastic infrastructure.

                       [ Lapchi Valley Mandala ]
                                  |
         +------------------------+------------------------+
         |                                                 |
[ Chöra Gephel Ling ]                             [ High Retreat Caves ]
  (Monastic Anchor)                                 (Spiritual Crucible)
         |                                                 |
  Built by Shabkar (~1830)                         - Rechen Phug (Handprints)
  Restored by Nubpa Rinpoche                       - Sephuk (4,600m Hermitage)
  Preserves Ancient Relics                         - Ze Phug (Holy Spring)

Chöra Gephel Ling Monastery

The monastery was founded around 1830 by another legendary figure in Tibetan Buddhism: Shabkar Tsogdrug Rangdrol (1781–1851), a yogi from Amdo who spent decades meditating in wilderness areas. Recognizing the deterioration of the older retreat structures in Lapchi, Shabkar mobilized his disciples to construct a central temple on a small, flat alpine plain known as Chöjung Mathang.

Over the centuries, Lapchi became deeply tied to the Drikung Kagyu school of Tibetan Buddhism. By the late 20th century, the monastery had fallen into near-total ruin due to the extreme climate and geopolitical isolation. However, through the tireless efforts of Nubpa Rinpoche and the Drikung Kagyu lineage, a monumental restoration project completely rebuilt Chöra Gephel Ling, featuring a beautifully preserved assembly hall, new retreat rooms for long-term practitioners, and a protective sanctuary for local monks.

The Miracle Stupa of Vajrayogini

Near the monastery stands the historic Jangchub Stupa, a monument built on grounds sacred to the female deity Vajrayogini. When Shabkar originally proposed building this stupa, he lacked financial resources. He requested that each of his hundreds of gathered disciples carry exactly one large stone to the site. Remarkably, because of the sheer size of the crowd, the entire stupa was fully constructed in a single day. To protect this ancient monument from collapsing due to weathering, a modern exterior stupa was recently constructed over it, encapsulating the original stones like a spiritual time capsule.

Natural Beauty and Biodiversity

While Lapchi is celebrated for its spiritual importance, its natural geography is equally striking, characterized by an undisturbed ecosystem.

  • Majestic Himalayan Peaks: The valley is dominated by the imposing, unclimbed granite spire of Ama Bamare Himal and the massive massifs of Gaurishankar (7,134m) looming along the horizon. Snow-covered peaks encircle the valley, providing dramatic backdrops.

  • Pristine Forests and Alpine Meadows: Lower elevations feature dense, moss-covered cloud forests of rhododendron, bamboo, pine, and juniper. During spring, blooming rhododendrons paint the hillsides in deep reds and pinks. Higher up, these forests give way to expansive alpine tundra filled with specialized wildflowers during the brief summer months.

  • Glacial Rivers: The fast-flowing Lapchi Khola and its tributaries are fed directly by glaciers along the Tibetan border, creating dramatic waterfalls, deep river gorges, and challenging river crossings.

Wildlife in the Gaurishankar Conservation Area

Because mass tourism has completely bypassed this region, the ecological environment remains highly pristine, making Lapchi a safe haven for rare Himalayan wildlife:

Category Species Common to the Lapchi Valley
Ungulates Himalayan Thar, Blue Sheep (Bharal), Musk Deer
Avifauna Himalayan Monal (Danphe), Snow Pigeons, Golden Eagles, Vultures
Elusive Predators Snow Leopard, Red Panda (found in dense bamboo zones)

Why Lapchi Remains Undiscovered

lapchi-valley

Several factors contribute to Lapchi’s relative obscurity:

  • Remote access
  • Limited promotion
  • Challenging trekking routes
  • Focus on spiritual rather than commercial tourism

For many travelers, these characteristics are precisely what make Lapchi special.

The absence of large crowds allows visitors to experience a deeper connection with nature, culture, and spirituality.

The Lapchi Valley Trek: Detailed Wilderness Itinerary

Trekking to Lapchi is categorized as a strenuous, high-alpine expedition. There are no luxury teahouses, no cellular networks, and no easy evacuation routes. It requires physical endurance, a resilient mindset, and proper logistical planning.

Expedition Summary

  • Total Duration: 7 to 11 days (depending on acclimatization and side hikes)

  • Maximum Elevation: 4,900 meters (High Alpine Lakes) / 4,600 meters (Sephuk Cave)

  • Trek Grade: Strenuous / Level 3

  • Accommodation Type: Camping, with very basic home-stays or monastery lodging in select spots.

Day-by-Day Itinerary

Day 1: Kathmandu to Lamabagar via Singati

  • Altitude: 1,950 meters (6,397 feet)

  • Travel Time: 8–10 hours by private 4WD Jeep

  • The Journey: The expedition leaves Kathmandu, following the Arniko Highway before branching off into the deep valleys of the Dolakha district. Driving alongside the roaring Tama Koshi River, you pass through the trading town of Charikot and end at Lamabagar, a small Sherpa settlement that serves as the last major road head and the site of massive hydroelectric infrastructure.

Day 2: Lamabagar to Lower Lumnang

  • Altitude: 2,700 meters (8,858 feet)

  • Trekking Time: 6–7 hours

  • The Trail: The trek begins with a passage through a 1.3-kilometer-long, unlit industrial tunnel built by the hydro project. Emerging into the raw wilderness, the trail climbs up a narrow, challenging path carved into the cliffs. You ascend steadily through dense bamboo groves and mossy forests, crossing rushing side-streams via suspension bridges before arriving at Lower Lumnang—the traditional winter settlement for the people of Lapchi.

Day 3: Lower Lumnang to Lapchi Village and Monastery

  • Altitude: 3,670 meters (12,040 feet)

  • Trekking Time: 5–6 hours

  • The Trail: This day features a significant altitude gain as you follow the Lapchi Khola upstream. As you approach the 3,600-meter mark, the dense forests give way to open alpine valleys. Suddenly, the ancient Chöra Gephel Ling Monastery and the scattered stone houses of Lapchi Village come into view. The village consists of only about 14 permanent households, whose residents survive primarily on high-altitude yak herding.

Day 4: Exploration of the Monasteries, Caves, and Footprints

  • Altitude: 3,670 meters (12,040 feet)

  • Activity: Acclimatization and Spiritual Exploration

  • The Experience: A dedicated day to explore the sacred topography of the valley floor. You will visit the main monastery building, spin the ancient prayer wheels, and visit Rechen Phug and Dudul Phug. Take time to sit in silent reflection inside the caves. The local monks and villagers are deeply welcoming, often sharing bowls of Tibetan salt-butter tea.

Day 5: The High Ascent to Sephuk Cave and the Alpine Lakes

  • Altitude: 4,600m (Sephuk) to 4,900m (Alpine Lakes)

  • Trekking Time: 6–7 hours (round trip)

  • The Trail: This is the most physically demanding day of the expedition. You leave the village early, climbing up steep ridges toward the high pastures. The trail passes through the retreat houses where dedicated monks undergo traditional three-year, three-month, three-day solitary retreats. Continuing upward, you reach the cliffside Sephuk Cave. Weather permitting, you can push further up to the high alpine glacial lakes at 4,900 meters, which offer panoramic views stretching into the Tibetan plateau.

Day 6: Lapchi Village to Lower Lumnang

  • Altitude: 2,700 meters (8,858 feet)

  • Trekking Time: 5 hours

  • The Trail: After bidding farewell to the monks and residents of Lapchi, you begin your descent. The trail retraces your steps back down through the river gorges, descending back into the richer air and dense green canopy of the lower forests to camp overnight at Lumnang.

Day 7: Lower Lumnang to Lamabagar to Kathmandu

  • Altitude: 1,350 meters (Kathmandu)

  • Trekking/Travel Time: 5 hours of hiking, followed by an 8–10 hour drive

  • The Finish: The final leg of the trek brings you back down through the river gorges and through the hydro tunnel to Lamabagar. Your vehicle will transport you back along the winding mountain roads, returning you to the vibrant energy of Kathmandu by late evening.

Practical Travel Information & Logistics

Because Lapchi is an isolated and highly sensitive border zone, independent or solo travel is not possible. Success requires adherence to strict legal and logistical guidelines.

1. Required Permits and Regulations

To legally enter the region, you must secure two distinct permits in Kathmandu through a registered Nepalese trekking agency:

  • Gaurishankar Conservation Area Permit (GCAP): Required for environmental entry into the protected conservation zone.

  • Rolwaling Valley / Lapchi Restricted Area Permit: Because Lapchi shares an open, sensitive border with Tibet, it falls under restricted area regulations. This mandate requires that you travel with a licensed, professional guide and a minimum of two trekkers per group. Solo trekking is strictly prohibited.

2. Best Time to Visit

Choosing the correct season is essential for safety, visibility, and accessibility.

  • Spring (March to May): One of the optimum windows. Temperatures are mild at lower elevations, rhododendron forests are in full bloom, and mountain views are generally clear. Wildlife is also highly active during this period.

  • Autumn (September to November): The premier trekking season. Post-monsoon air provides excellent atmospheric visibility, stable weather conditions, and crisp, clear mountain scenery.

  • Winter (December to February): Heavy snowfall frequently buries the high trails, and temperatures drop far below freezing. Water sources freeze solid, and most local villagers descend to lower settlements, leaving the upper valley mostly deserted.

  • Monsoon (June to August): Heavy rainfall triggers landslides along the vertical access trails, paths become slick and hazardous, and mountain visibility is severely obscured.

3. Essential Packing List

There are no stores to purchase or rent gear once you leave Kathmandu. You must be completely self-sufficient.

  • Sleeping Systems: A high-quality down sleeping bag rated for comfort down to at least $-15^\circ\text{C}$ ($5^\circ\text{F}$), accompanied by an insulated sleeping pad.

  • Apparel: A windproof, waterproof shell jacket and pants; a heavyweight down parka for freezing nights; and thermal base layers (merino wool is highly recommended).

  • Footwear: Sturdy, broken-in waterproof hiking boots with deep tread to navigate wet rock, mud, and scree.

  • Water Safety: A reliable UV purifier (such as a SteriPEN) or water purification tablets, as you will be drawing water directly from glacial streams.

Challenges and Responsible Tourism

Environmental and Cultural Challenges

  • Communication Limitations: There is no mobile network coverage (Ncell or Nepal Telecom) once you enter the deep gorges beyond Lamabagar. Satellite communication devices are highly recommended for emergency evacuation logistics.

  • Physical Demands: The rapid elevation gain from Lamabagar (1,950m) to Lapchi Village (3,670m) over two days presents a real risk of Acute Mountain Sickness (AMS). Walking at a slow, measured pace and maintaining proper hydration are critical.

Cultural Etiquette and Respect

Lapchi is an active, sacred pilgrimage site, not a commercial tourist trail. Visitors are expected to respect local customs:

Sacred Etiquette Guidelines:

  • Monastery Attire: Always cover your shoulders and knees when entering temple spaces. Remove your footwear before stepping onto the wooden floors of the assembly halls.

  • Circumambulation: Always walk around monasteries, stupas, chortens, and mani stone walls in a clockwise direction.

  • Photography: Never photograph the interior of shrines, sacred relics, or meditating monks without explicitly asking for permission first.

  • Waste Management: Practice strict “Leave No Trace” principles. Pack out all non-biodegradable waste, plastics, and batteries.

The Future of Tourism in Lapchi

As awareness of Lapchi increases, tourism is expected to grow gradually.

Careful management will be essential to balance:

  • Visitor access
  • Environmental conservation
  • Cultural preservation
  • Community benefits

Sustainable development can help ensure that Lapchi retains its unique character while providing economic opportunities for local communities.

Conclusion: The Purest Himalayan Form

What differentiates a casual trekker from a true pilgrim? A trekker seeks to conquer the physical landscape; a pilgrim allows the landscape to transform them from within.

Lapchi Valley remains refreshingly authentic in an era when many mountain destinations have succumbed to commercialization. It is a rare sanctuary where spirituality, history, culture, and nature converge in their purest forms. Whether you are a trekker seeking a rugged wilderness challenge, a practitioner looking to meditate in the footsteps of Milarepa, or a traveler in search of something extraordinary, Lapchi Valley stands as one of Nepal’s premier hidden treasures—waiting to be approached with reverence, discipline, and an open mind.

Dhampus Peak Climbing in 2026 — The Guide I Wish I Had Before Going

Okay, so I’ll be straight with you.

When I first started researching trekking peaks in Nepal, Dhampus Peak was not even on my list. Island Peak kept showing up everywhere. Mera Peak had a dozen agencies pushing it. Those are the names that dominate every “best Nepal climbing peaks” roundup, and honestly, I nearly just booked one of those and called it done.

Then someone who had actually been to Dhampus told me to stop overthinking it and just go there instead.

Best advice I ever ignored for six months before finally taking.

Dhampus Peak stands at 6,012 meters in Nepal’s Dhaulagiri region and is one of the most underrated climbs in the country. Not because it is secretly easy — it is not. because nobody knows about it — some people do. But because the combination of what you see, where you walk, and how few other teams you encounter up there is genuinely hard to find anywhere else on a trekking peak budget and timeline.

Thirty Himalayan peaks are visible from the summit. The Kali Gandaki Valley on the approach. A section called the Hidden Valley that sounds made up, but absolutely is not. And a base camp that does not feel like a parking lot in October.

Here is everything you need to plan this properly in 2026.

What Is Dhampus Peak and Where Exactly Is It

Some maps label this mountain as Thapa Peak. Both names refer to the same place — two names have been floating around in different agencies and expedition reports for years, so don’t be thrown off when you see both.

The mountain is in western Nepal, straddling the Myagdi and Mustang district border, sitting between the Annapurna and Dhaulagiri ranges. The Kali Gandaki gorge cuts right through this region. That gorge is, technically, the deepest river canyon on the planet, which starts to make sense once you are actually standing in it, looking up at the walls of the mountain on both sides.

The Nepal Mountaineering Association classifies Dhampus as a Group B trekking peak.

Elevation is 6,012 meters, or 19,724 feet. The standard climbing route goes up through the Hidden Valley and finishes along the west ridge with snow and glacier terrain in the final push.

The summit view is the thing that people who have been there bring up unprompted, often months later. Dhaulagiri at 8,167 meters is almost uncomfortably close. Annapurna I, Tukuche Peak, Nilgiri, Hiunchuli, Tilicho Peak, Mukut Himal. Roughly thirty peaks on a clear day. That number is real, and the panorama genuinely earns it.

Detail Information

Detail Info
Elevation 6,012 m / 19,724 ft
Also Known As Thapa Peak
Location Myagdi & Mustang Districts, Nepal
Grade Non-technical to Moderate
Best Seasons Spring & Autumn
Typical Duration 14 to 18 days

How Hard Is This Climb

Not technically hard. That is the accurate answer.

No near-vertical faces. No mixed climbing that requires an ice climbing course as a prerequisite. You will use crampons and carry an ice axe, and your guide will go through the practical basics at base camp before any of it matters on the mountain. People who have never worn crampons before their Dhampus climb have reached the summit fine.

What the mountain does have, and what catches people genuinely off guard, is altitude.

Here is what 5,500 meters after five consecutive trekking days actually feels like — you wake up at 2 am with a headache pressing behind your eyes. Your sleeping bag feels both too hot and somehow not warm enough. You eat half your breakfast because your appetite left somewhere around 4,800 meters and did not come back. You are walking at a pace that would embarrass you at sea level, and your legs are doing it anyway like that is just how walking works now.

None of that is a fitness failure. It is just what altitude does.

People who have done Everest Base Camp or completed the Annapurna Circuit already know this version of themselves and tend to manage it well on Dhampus. People whose trekking experience is all below 3,000 meters sometimes get a rude introduction to it at the worst possible moment.

Fit, motivated beginners summit at Dhampus every season. It absolutely happens. Just go in knowing that your gym fitness and your altitude fitness are two separate and not especially related things.

When To Go — Real Answer Not Just “Spring or Autumn”

Spring means March through May. April and May are the months with the most stable weather, clearest skies, and the rhododendron forests on the lower trail sections in full bloom, which makes the approach genuinely beautiful in a way that feels almost unfair, given you are also about to climb a mountain. Spring permits cost USD 250 per person because demand is highest then.

Autumn is September through November. The permit drops to USD 125. After the monsoon clears out of the valleys, the air quality changes in a way that sounds like a cliché until you actually experience visibility from 6,000 meters in October. I have heard guides who have done this route dozens of times say October is their favourite month up there, and I believe them completely.

Monsoon, June through August, is not a climbing window. Leeches on the lower trail, dangerous weather above 5,000 meters, and mud on paths that need to be dry. People do attempt it, but the experience is a different and significantly worse thing.

Winter is theoretically possible. The cold above 5,000 meters in January is not the same category of cold as a chilly morning anywhere else. Unless serious cold-weather mountaineering is already part of your background, winter is a hard pass.

The Route — Kali Gandaki Into the Hidden Valley

You get to Jomsom by a short flight from Pokhara. That landing is one of the more dramatic approaches in aviation; the runway sits in a valley with mountains on both sides, and the wind through the gorge makes every pilot earn their landing. From Jomsom, you make your way to Tukuche in the Kali Gandaki Valley, and that is where the climb properly starts.

The trail from Tukuche follows routes that salt traders used between Nepal and Tibet for centuries. Carved mani stones, old stone walls, villages that were not built for tourism, and still feel that way. There is real remoteness here that the more travelled Nepal trekking circuits have largely lost.

After base camp and acclimatization days, the route pushes through French Pass at 5,360 meters and into the Hidden Valley. This section is why people who have done Dhampus become almost evangelical about it. Wide, silent, surrounded by giants, with almost no other teams passing through. Most people who trek in Nepal never see that this place exists.

High Camp is set up from the Hidden Valley. Summit push goes out early the next morning, following the west ridge on snow and glacier terrain. The final section is exposed but manageable with the right footwear and a guide who knows the mountain. After the summit, descent goes back through toward Jomsom and a flight closes the loop to Pokhara.

Day by Day — 14 Day Itinerary

Day 1 — Land in Kathmandu. Meet your guide team, final permit paperwork, gear check.

Day 2 — Travel to Pokhara. The flight is 25 minutes. The bus is seven hours with better scenery.

Day 3 — Fly Pokhara to Jomsom. Drive or walk to Tukuche. Trek begins.

Days 4, 5, 6 — Trekking approach through the Kali Gandaki Valley. Teahouse accommodation throughout. Long days, good food, genuinely stunning scenery.

Days 7, 8 — Acclimatization at base camp level. Shorter hikes up and back. Your body needs these days even when you feel fine.

Day 9 — Move to High Camp.

Day 10 — Summit day. Early start, summit push to 6,012m, return to camp.

Days 11, 12 — Descent back to Jomsom.

Day 13 — Fly Jomsom to Pokhara. Hotel overnight.

Day 14 — Return to Kathmandu. Departure.

The extended 18 to 22 day version adds the full Dhaulagiri Circuit. If your schedule can absorb the extra days, that route is a serious upgrade to an already excellent trip.

Permits — Three of Them, None Optional

All three permits have to be arranged through a registered agency. The Nepal Mountaineering Association does not process individual applications. Give yourself two weeks minimum for the permit process.

The climbing permit costs USD 250 per person in spring. USD 125 in autumn. USD 70 in winter or summer. You also need the Annapurna Conservation Area Permit, known as ACAP, covering the protected region your trek passes through. And a TIMS Card, which is the standard trekking permit required across Nepal.

Total permit costs come in between USD 170 and USD 300, depending on the season.

What Everything Costs in 2026

A full expedition package with a reputable company — permits, guide, and climbing Sherpa, porters, cook staff, all accommodation from teahouses on the approach to tented camps on the mountain, all meals, and all transportation from Kathmandu through Pokhara and Jomsom and back — runs between USD 2,400 and USD 3,500 per person.

Outside that number: flights to Nepal from wherever you are, travel insurance with helicopter evacuation coverage, which is not negotiable on a Himalayan climb, any personal gear you want to own rather than rent, and tips for your crew, which local mountain staff genuinely rely on.

Green Horizon Tours builds packages without hidden costs. The number you receive in your quote is the trip you get.

Gear List — What You Actually Need

Clothing

Thermal base layer, fleece mid-layer, heavy down jacket, waterproof hardshell, insulated gloves with overmitts over them because regular gloves disappear at high altitude temperatures, balaclava, multiple pairs of wool socks. Summit mornings on this ridge are cold enough to make you regret every layering shortcut.

Boots

Double-layer mountaineering boots compatible with crampons for the technical sections, and a separate pair of hiking boots for the Kali Gandaki approach. Your feet will thank you for not spending a week on a trail in technical climbing boots.

Technical Gear

Crampons, ice axe, harness, helmet, and carabiners. Your agency specifies what they provide and what you source yourself or rent in Pokhara or Kathmandu.

Personal Essentials

Glacier glasses, SPF 50 sunscreen because UV at altitude is genuinely brutal and people underestimate it every single time, headlamp with fresh batteries, not the ones already in it, trekking poles, sleeping bag rated to minus 20 Celsius minimum, altitude medication, which you discuss with your doctor before leaving home, not after arriving in Nepal.

Altitude Sickness — Read This Part

Fitness does not protect you from altitude sickness. This is the most common misconception I encounter from people planning their first Himalayan climb. Some extremely fit people get knocked sideways above 5,000 meters. Some people in ordinary conditions walk through it. It is physiological and does not follow any logic related to how fast you can run a 5k.

Early signs: a headache that will not shift, nausea, no appetite, bad sleep, and a general mental fog that makes concentration harder than it should be. The moment any of those appear, tell your guide. The serious outcomes — fluid in the lungs or brain swelling — only happen when early warnings get ignored or pushed through.

Prevention is genuinely simple but has to be actually followed: stick to the acclimatization schedule without shortcuts, even on days when you feel perfectly fine, drink four litres of water daily, eat real meals, and when your guide says descend, you descend without a discussion about it.

Travel insurance with helicopter evacuation. Before you leave home. Non-negotiable.

Dhampus vs Other Trekking Peaks

Against Island Peak at 6,189 meters

Island Peak is more technical, significantly more crowded, and in the Everest region rather than the Annapurna. The summit day has a longer fixed rope section, and the base camp has noticeably more foot traffic throughout the season. Dhampus is quieter, slightly lower, and gives a wider panorama.

Against Mera Peak at 6,476 meters

Mera involves more sustained glacier work and sits higher. It is the natural next step after Dhampus rather than a direct comparison. Do Dhampus first.

Against Lobuche at 6,145 meters

Lobuche has steeper technical sections better suited to people with at least one trekking peak summit already on their record. Dhampus is where you start before Lobuche.

Questions People Actually Ask

Can a beginner do this?
Yes, with real preparation. Prior trekking above 4,500 meters is strongly recommended. Anyone who has completed Everest Base Camp or the Annapurna Circuit is well-positioned for Dhampus.

What is the success rate?
With proper acclimatization and a workable weather window, most prepared teams reach the summit. Altitude sickness and weather turn people back, not technical difficulty.

How far in advance should I book?
Three months ahead for spring. Six to eight weeks minimum for autumn, though earlier is genuinely better for date flexibility.

Is It Worth It

At 6,012 meters with Dhaulagiri filling the sky directly in front of you and the full Annapurna range stretched out to the east, with thirty peaks visible in every direction, and nobody else standing on that ridge with you — yes. It is absolutely worth it.

The trail is quiet. The Hidden Valley section is unlike anything else on the Nepal trekking map. The summit feels earned because it is. And the approach through the Kali Gandaki is the kind of walk that reminds you why you started caring about mountains in the first place.

Green Horizon Tours has been guiding climbs across Nepal since 1992. Our teams know Dhampus Peak through every season and every kind of weather. If you want a straight conversation about whether this climb suits your experience and timeline, reach out here — no sales pitch, just honest answers.

Pisang Peak Climbing: Cost, Difficulty, Itinerary and Everything You Actually Need to Know

I’ll be honest with you. When I first heard about Pisang Peak, I thought it was one of those mountains that operators hype up to sell packages to people who aren’t ready for something real.

I was wrong.

Pisang Peak is 6,091 meters. That’s not a number you throw around casually. That’s above the altitude where your body starts doing things you don’t expect, where a headache at 2 pm becomes a serious conversation by 8 pm, where every extra kilogram in your pack becomes a personal grudge. And yet every season, people with no climbing background show up, do the work, and stand on that summit. Regular people. Teachers, accountants, software developers. People who trained for it and picked a guide who knew what they were doing.

So the question isn’t really whether Pisang Peak is possible for you. It probably is. The question is whether you’ll prepare as it deserves.

pisang-peak

First, Where Even Is This Mountain?

Pisang Peak sits in Nepal’s Manang District, which is part of the Annapurna Conservation Area. You pass directly through the area if you’re doing the Annapurna Circuit, which is one reason why so many trekkers end up eyeing it. It’s right there. You’re walking past the base of it for days before you realize what you’re looking at.

The village of Upper Pisang sits at the foot of the mountain. Locally, the peak is called Jong Ri, which almost nobody outside the region knows. It was first climbed in 1955 by a German team and has been attracting climbers in growing numbers ever since. The Nepal Mountaineering Association classifies it as a trekking peak, their way of saying it’s achievable without an elite expedition team, but definitely not a stroll either.

From the summit on a clear morning, you can see Annapurna II, III, and IV almost close enough to touch. Gangapurna across the valley. Tilicho Peak. On the best days, a slice of Manaslu in the far distance. People who get up there say it’s the kind of view that rearranges something in your head. I believe them.

At a Glance

Details Information
Height 6,091 meters / 19,983 feet
Location Manang District, Annapurna region
Trip Length 16 to 20 days
Difficulty Moderate to Challenging
Best Time Spring and Autumn
Permits Three required
Skills Basic mountaineering

How Hard Is It, Genuinely?

This is what everyone wants to know, and nobody gives a straight answer to. So here’s mine.

The climbing itself is not the hard part for most people. Yes, you’re on crampons. Yes, you’re using an ice axe on the upper section. Yes, there are fixed ropes near the summit that you clip into. None of that is beyond what a reasonably coordinated person can learn quickly. Your guide will go through all of it with you at base camp. The technical side of Pisang is real, but it’s teachable.

What actually ends trips is altitude. Not fitness. Altitude.

You can run half marathons and still feel genuinely awful above 5,000 meters if your body hasn’t had time to adjust. The red blood cell count, the way your lungs process oxygen up there, that doesn’t improve with willpower. It improves with time, rest, and not being stupid about rest days. The itinerary has acclimatization built in for exactly this reason. The people who skip those days because they feel fine are usually the ones turning around at high camp two days later.

Beginners can absolutely climb Pisang Peak. But “beginner” means someone who has spent time at altitude before, who has done serious multi-day trekking, and who has genuinely trained for this in the months before. Not someone who goes to the gym three times a week and thinks that covers it.

The Route

pisang-peak

The approach goes through Upper Pisang village and climbs through high yak pastures above the treeline. There’s a stretch up here that’s just an open rocky plateau with prayer flags and massive silence and the mountain growing in front of you. It’s worth the whole trip before you’ve even reached base camp.

Base camp sits at around 4,300 meters. You spend a day or two here, do your climbing practice, and let your body adjust. Then, the high camp at roughly 5,400 meters, which is a shorter day physically but hits harder than you expect because of where your body is by now.

Summit day starts before dawn. Headlamps across the glacier, west ridge on snow and ice, and then the top. Most groups take five to seven hours from high camp. Descent follows the same route. By afternoon, you’re back at camp trying to eat something and process what just happened.

The western face of the mountain is blocked by a hanging glacier and rock slabs that make it essentially unclimbable from that side. The southwest ridge is the route and has been for decades.

Day by Day

Day 1 — Arrive Kathmandu

Gear check tonight, not tomorrow morning.

Day 2 — Drive to Besisahar or Bhulbhule

Seven or eight hours. Bring snacks and something to read.

Day 3 — Trek to Jagat

Day 4 — Trek to Dharapani

Day 5 — Trek to Chame

You’re gaining real elevation now. Pay attention to how you feel.

Day 6 — Trek to Lower Pisang

The peak starts coming into view.

Day 7 — Upper Pisang

Short acclimatization walk in the afternoon, nothing ambitious.

Day 8 — Rest Day in Manang

Do not skip this. Walk around the village. Eat. Sleep. That’s it.

Day 9 — Trek to Base Camp at 4,300 Meters

Day 10 — Training Day

Crampons, ice axe, rope technique. Ask every question you have.

Day 11 — Move to High Camp at 5,400 Meters

Day 12 — Summit Push

Then all the way back down to base camp.

Day 13 — Reserve Day for Weather

Used more often than people expect.

Day 14 — Start Heading Back Down Toward Manang

Days 15 to 20

Trek out, drive back to Kathmandu, done.

Total trip runs 16 to 20 days. Different operators structure this slightly differently, so confirm the breakdown before you book.

Best Time to Go

Ask any guide who has been up Pisang multiple times, and most of them will say April without much hesitation. The weather holds longer in spring, the sky stays clear in the mornings, and the snowpack on the upper sections is usually in good condition. It’s the season when everything cooperates.

October is the other option and a genuinely strong one. After the monsoon, the Himalayan air gets a clarity that people who’ve experienced it mention almost every time. The trail is slightly less busy than in the spring, which some people prefer. The permit costs less too, $175 versus $350 for the spring season.

Winter is technically possible in Manang because the district sits in a rain shadow and gets less snowfall than most of Nepal. But cold at high camp in December or January is a different category of cold, and the summit success rate drops. Not a first-time season.

Monsoon, June through August, is a firm no. Visibility goes, trails flood, the risk is pointless.

Season Months Conditions Permit
Spring March to May Best overall $350
Autumn Sept to Nov Excellent, clearer budget $175
Winter Dec to Feb Tough, not for beginners $175
Monsoon June to Aug Don’t $175

Permits You Need

Three of them. None optional.

The NMA climbing permit is the big one, issued by the Nepal Mountaineering Association. Spring costs $350 per person. Every other season it’s $175. There’s also a $500 garbage deposit that comes back to you at the end.

The Annapurna Conservation Area Permit is about $30 for foreign nationals. Standard for entering the region.

The TIMS card is around $10 and mandatory for all trekkers in designated Nepal trekking zones.

Most package operators roll all of these into the total price. Confirm that in writing before you pay anything. Some don’t, and the surprise later is never pleasant.

What the Whole Thing Costs

Prices in 2026 run across three rough tiers.

Package Per Person
Budget $1,500 to $2,000
Standard $2,000 to $2,800
Premium $2,800 to $3,500+

A standard package covers permits, a licensed climbing guide, porters, all meals on the trail, accommodation throughout, and transport from Kathmandu. Outside that: your personal gear, travel insurance, tips for the crew, and anything you spend in Kathmandu before and after.

You can rent crampons, a harness, and an ice axe in Thamel in Kathmandu at reasonable rates if you don’t own the gear already. Most shops there know exactly what a Pisang Peak trip needs.

Pisang Peak or Island Peak?

People argue about this constantly online. Here’s the simple version.

Pisang Peak Island Peak
Height: 6,091m Height: 6,189m
Annapurna Everest region
Moderate Moderate to harder
Quieter Busy
Full Annapurna panorama Everest and Lhotse
Lower cost Slightly higher

If being near Everest matters to you specifically, then Island Peak wins on location. But Pisang gives you the full Annapurna Circuit experience around the climb, fewer people waiting on the fixed ropes, and a summit view that most people find genuinely shocking in the best sense. For a first Himalayan climb, most guides will quietly point you toward Pisang. That says something.

Quick Answers to Things People Ask Before Booking

Can a beginner climb this?

With proper preparation and respect for the acclimatization schedule, yes. Without those two things, probably not.

How many days total?

16 to 20 days, Kathmandu to Kathmandu.

Is travel insurance mandatory?

More than mandatory. It must cover mountaineering at 6,100 meters and helicopter evacuation specifically. Read your policy line by line before you leave home. Some adventure policies cap at 4,000 or 5,000 meters and won’t cover this.

What’s the summit success rate?

No official numbers exist publicly. With a good guide, proper acclimatization, and reasonable weather, the majority of prepared climbers make it. Weather and how your body handles altitude are the two real variables.

Best single month?

April, if you’re going in the spring. October, if you’re going in autumn.

Why People Come Back Changed

There’s a specific feeling that happens somewhere on day ten or eleven of a climb like this.

Everything that felt urgent back home starts to seem a bit smaller. Not in a cliché way. Just in the practical sense that your whole brain is occupied with the next hour and the body scan you’re doing every twenty minutes to track how you feel.

People come back from Pisang Peak quieter about certain things. More sure of themselves about others. It sounds like something a brochure would say, but ask anyone who has stood on that summit, and they’ll tell you the same thing in their own words, unprompted.

If this is something you’re seriously considering for 2026, the team at Green Horizon Tour has done this route across seasons and knows it properly. Permits, guides, logistics, all handled. Reach out early because the spring spots fill faster than people expect.

Nepal Trekking Permit Update 2026: The Ultimate Comprehensive Guide for Trekkers

Nepal remains the ultimate crown jewel of global adventure tourism, beckoning thousands of trekkers each year to stand among the highest peaks on earth. From the legendary footsteps leading to Everest Base Camp to the high passes of the Annapurna Circuit, the cascading waterfalls of Langtang, and the forbidden landscapes of Upper Mustang, the country provides unparalleled wilderness experiences.

However, the regulatory landscape of the Himalayas has evolved dramatically. The days of simply buying a generic paper booklet, packing a map, and setting off completely independent into any mountain valley are gone. To protect fragile high-altitude ecosystems, support local indigenous economies, and mitigate safety risks, Nepal’s trekking permit policies, fees, and safety laws have undergone a massive digital and structural overhaul.

Many trekkers arrive in Kathmandu completely unaware of recent landmark legal amendments, updated fee structures, or changes at regional checkpoints. This frequently results in costly administrative delays, unexpected fines, or being turned back at trail gates.

This comprehensive, definitive guide provides everything you need to know about Nepal’s trekking permit updates for 2026, covering specific costs, digital application pipelines, newly modified safety mandates, and actionable strategies for a seamless Himalayan adventure.

Why Does Nepal Require Trekking Permits?

Trekking permits serve a far greater purpose than mere bureaucratic administration. They are a multifaceted tool designed to ensure sustainable tourism management and maximize field safety.

+-------------------------------------------------------------------------+
|                    THE MULTI-PURPOSE PERMIT SYSTEM                      |
|                                                                         |
|  [ Safety & Rescue ]   --> Logs route paths for helicopter dispatch.    |
|  [ Local Revenue ]     --> Direct cash flows to trail-side schools/care.|
|  [ Eco-Preservation ]  --> Funds park rangers & wildlife conservation.  |
+-------------------------------------------------------------------------+

When you purchase a permit, your data and funds directly help authorities:

  • Monitor Visitor Movements: Tracking accurate entry, exit, and real-time location metrics across massive wilderness zones.

  • Improve Trekker Safety: Maintaining highly synchronized databases to quickly locate and coordinate help during severe weather events, avalanches, or medical emergencies.

  • Support Search and Rescue Operations: Providing immediate, legally verified reference data to rescue teams, ground search units, and helicopter evacuation dispatch networks.

  • Protect National Parks and Conservation Areas: Enforcing environmental preservation policies and funding trail rangers to prevent illegal deforestation and poaching.

  • Preserve Cultural Heritage: Reinvesting revenues directly into restoring centuries-old Buddhist monasteries (gompas), ancient stone pathways, mani walls, and shrines.

  • Generate Revenue for Local Communities: Ensuring tourism capital bypasses centralized urban systems and flows straight into mountain villages to construct local medical clinics, manage waste, and fund schools.

What Permits Are Required for Trekking in Nepal?

The permits you need depend entirely on your precise trekking destination, trail junctions, and duration of stay. Generally, an international trekker will require a customized combination of at least two of the following documents:

  • National Park Entry Permit: Mandatory if your trail cuts through legally protected national boundaries (e.g., Sagarmatha, Langtang, Rara, or Shey-Phoksundo).

  • Conservation Area Permit: Required for sustainably co-managed regional eco-zones (e.g., Annapurna, Manaslu, Gaurishankar, or Kanchenjunga).

  • Restricted Area Permit (RAP): A highly regulated, premium-tier authorization card mandatory for remote border-adjacent or culturally sensitive areas.

  • Local Municipality Entry Permit: Independent regional taxes managed directly by local governing councils rather than central tourism boards.

For over a decade, one of the most frustrating barriers for solo travelers visiting Nepal was the rigid “Minimum 2 Trekkers” rule for Restricted Area Permits (RAP). If you wanted to explore Upper Mustang, the Manaslu Circuit, or Dolpo, you were legally forced to find an additional foreign partner or purchase a fraudulent “ghost permit” just to satisfy a bureaucratic quota.

On March 22, 2026, the Department of Immigration (DoI), acting on strategic policy briefs from the Trekking Agencies’ Association of Nepal (TAAN), officially transformed this policy.

                    +------------------------------------+
                    |    THE 2026 SOLO RESTRICTED RULE   |
                    +------------------------------------+
                                      |
         +----------------------------+----------------------------+
         |                                                         |
         v                                                         v
[ True Independence ]                                    [ Non-Negotiable Guide ]
  - Single/Solo foreign trekkers                           - Guide mandatory at all times
  - No partner or group required                           - Must book through a 
  - Personalized RAP issued                                  TAAN-registered agency

What Changed in 2026?

  • Solo Restricted Area Permits Are Now Active: A single foreign trekker can now apply for and receive a Restricted Area Permit in their own name. You no longer need a second traveler in your party.

  • Pre-Arrival Digital Processing: Trekkers can now complete their permit applications completely in advance from their home country using their Nepal Tourist Visa Number or Visa Application Submission ID. This ensures all documentation is finalized before you arrive in Kathmandu.

  • The New 1:7 Guide-to-Trekker Ratio: For group travelers, the 2026 rules dictate that one licensed guide can accompany a maximum of 7 trekkers. If a group has 8 or more participants, the hosting agency must legally assign a second licensed guide to ensure maximum high-altitude safety.

Crucial Clarification: This update does not allow independent, guideless trekking. While you no longer need a second foreign companion, you are still legally required to hire a licensed local guide and process the permit through a TAAN-registered agency. Independent hiking in restricted zones remains strictly prohibited.

TIMS Card Update 2026: The Switch to E-TIMS

What Is a TIMS Card?

TIMS stands for Trekkers’ Information Management System. It acts as a central database to record itineraries, verify guide associations, and track real-time mountain safety metrics across the country.

Is TIMS Required in 2026?

The traditional, physical paper TIMS cards (the old independent green and group blue cards) have been completely phased out. In their place, Nepal has fully transitioned to a centralized, computerized E-TIMS (Electronic Trekkers’ Information Management System).

How E-TIMS Works in 2026

  • Mandatory Digital Registration: All foreign trekkers entering protected areas must be registered through the digital E-TIMS portal.

  • QR Code Scanners: The system generates a digital QR code linked directly to your passport, your travel insurance data, and your guide’s official license number. Real-time digital scanners are active at major checkpoints to verify your credentials.

  • The Price: The standard E-TIMS registration fee is NPR 2,000 (~$15 USD) per person.

  • The Structural Breakdown: Checkpoints in the Everest (Khumbu) and Annapurna regions do not enforce or check TIMS cards anymore, prioritizing their own conservation and municipality permits. However, E-TIMS remains strictly mandatory for Langtang, Manaslu, and far-western Nepal.

Breakdown of Key Trekking Regions & Permit Requirements

Nepal’s comprehensive “No Guide, No Trek” safety policy is fully active. Any foreign national hiking in a National Park, Conservation Area, or Restricted Zone must be accompanied by a licensed Nepali guide. Solo trekking without a guide on major trails is illegal and heavily monitored at checkpoints.

1. Annapurna Conservation Area (ACAP)

The Annapurna Conservation Area is Nepal’s largest protected sanctuary, encompassing world-famous routes like the Annapurna Circuit, Annapurna Base Camp (ABC), Mardi Himal, Khopra Ridge, and Ghorepani Poon Hill.

  • Permit Required: Annapurna Conservation Area Permit (ACAP).

  • Cost for Foreigners: NPR 3,000 (~$23 USD) + 13% VAT.

  • Where to Obtain: Tourism offices in Kathmandu or Pokhara, or via your registered trekking agency. It is valid for a single entry with no time limit.

  • Guide Rule: Strictly enforced. Checkpoints at trail entry points like Birethanti, Ghandruk, and Tatopani actively verify your guide’s credentials via the digital database.

2. Sagarmatha National Park & The Everest Region (Khumbu)

The Everest region operates independently of the central tourism office permit lines, utilizing a decentralized fee structure that directly benefits the local Sherpa communities.

  • Permit 1: Sagarmatha National Park Entry Permit

    • Required For: Everest Base Camp Trek, Gokyo Lakes, Three Passes Trek, and Everest Panorama.

    • Cost for Foreigners: NPR 3,000 (~$23 USD) + 13% VAT.

    • Where to Obtain: Can be bought at the park entrance gate in Monjo or online via the National Parks office interface.

  • Permit 2: Khumbu Pasang Lhamu Rural Municipality Permit

    • Required for: All trekkers entering the broader Khumbu region.

    • Cost for Foreigners: NPR 3,000 (~$23 USD) per person for the first 4 weeks.

    • Where to Obtain: This local entry token is paid directly in cash at local counters in Lukla or Monjo. It completely replaces the TIMS card in the Everest zone.

3. Langtang National Park

Boasting pristine alpine valleys, the holy waters of Gosaikunda Lake, and traditional Tamang cultural heritage, the Langtang region is highly accessible from Kathmandu.

  • Permit Required: Langtang National Park Permit + E-TIMS Registration.

  • Cost for Foreigners: NPR 3,000 (~$23 USD) + 13% VAT.

  • Where to Obtain: Processed via your agency or available at the park entrance checkpoint in Dhunche.

  • What it Supports: Wildlife protection, park ranger monitoring, and sustainable community development programs.

Restricted Area Permits (RAP) Detailed Index

If you intend to venture into the remote corners of the Himalayas that border Tibet, you must acquire a specialized Restricted Area Permit. Under the updated 2026 framework, remember that you can apply for these solo, but a licensed guide from a TAAN-registered agency is non-negotiable.

Here is the exact cost and duration structure for the most popular restricted zones:

Upper Mustang Permit

Often called the “Last Forbidden Kingdom,” Upper Mustang features striking semi-arid landscapes, ancient sky caves, and preserved Tibetan-Buddhist cultural sites.

  • Cost: $500 USD per person for the first 10 days.

  • Extended Stay: $50 USD per day for every day after the initial 10-day block.

Manaslu Circuit Permit

The Manaslu Circuit Trek has become one of Nepal’s fastest-growing deep mountain routes, prized as an authentic alternative to the busier Annapurna loops.

  • Autumn Peak Cost (September to November): $100 USD per person for the first 7 days ($15 USD per extra day).

  • Spring & Off-Peak Cost (December to August): $75 USD per person for the first 7 days ($10 USD per extra day).

  • Additional Requirements: Trekkers also need a Manaslu Conservation Area Permit (MCAP) for NPR 3,000 and an ACAP permit for NPR 3,000 to exit through Dharapani.

Upper Dolpo Permit

Immortalized by remote high-altitude lifestyles and the stunning turquoise expanse of Shey Phoksundo Lake, Upper Dolpo remains a pristine sanctuary.

  • Cost: $500 USD per person for the first 10 days.

  • Extended Stay: $50 USD per day for every day after the initial 10-day block.

Tsum Valley Permit

A sacred Himalayan valley tucked away in northern Gorkha, rich in ancient monasteries and meditation caves.

  • Autumn Peak Cost (September to November): $40 USD per person for the first week ($7 USD per extra day).

  • Off-Peak Cost (December to August): $30 USD per person for the first week ($7 USD per extra day).

Kanchenjunga & Taplejung Permits

Skirting the border of eastern Nepal and Sikkim, the base camp trails of Mt. Kanchenjunga (the world’s third-highest peak) offer incredible biodiversity.

  • Cost: $20 USD per person per week for the first 4 weeks ($25 USD per week thereafter).

Comprehensive Permit Cost Summary Table

Trekking Region / Permit Type Cost for Foreigners (Approx. USD) Guide Required? Primary Checkpoints
Annapurna (ACAP) NPR 3,000 (~$23 USD) Yes — Mandatory Birethanti, Ghandruk, Tatopani
Sagarmatha (Everest National Park) NPR 3,000 (~$23 USD) Yes — Mandatory Monjo Gate
Khumbu Municipality (Everest Local) NPR 3,000 (~$23 USD) Yes — Mandatory Lukla, Monjo
Langtang National Park Permit NPR 3,000 (~$23 USD) Yes — Mandatory Dhunche
E-TIMS Card (Non-Everest Zones) NPR 2,000 (~$15 USD) Yes — Mandatory System Scanned Online
Upper Mustang RAP $500 USD (for 10 days) Yes — Mandatory Kagbeni
Manaslu Circuit RAP (Peak Autumn) $100 USD (for 7 days) Yes — Mandatory Jagat
Upper Dolpo RAP $500 USD (for 10 days) Yes — Mandatory Suligad
Kanchenjunga RAP $20 USD (per week) Yes — Mandatory Taplejung

Guide Certification Levels Matching Your Route

Under the strict 2026 administrative safety guidelines, it is no longer enough to just hire any guide on the street. The Department of Immigration monitors guide certifications relative to the maximum altitude of your chosen trekking route:

  1. Basic Certification: Authorized for lower-altitude cultural routes and panoramic trails up to 4,000 meters (e.g., Ghorepani Poon Hill, short Langtang routes).

  2. Advanced Certification: Mandatory for high-altitude passes and base camps sitting between 4,000 meters and 5,500 meters (e.g., Everest Base Camp, Annapurna Circuit via Thorong La, Manaslu Circuit via Larkya La).

  3. Expedition Certification: Compulsory for technical alpine passes, peak climbing, and mountaineering expeditions operating above 5,500 meters (e.g., Island Peak, Mera Peak, Ama Dablam).

Pro-Tip: When booking your trek, do not simply choose an agency based on the cheapest price. Explicitly ask them to verify their guide’s TAAN registration and confirm that their certification level legally covers the maximum altitude of your itinerary.

Step-by-Step Guide: How to Obtain Your Permits

The 2026 digital overhaul has made the permit pipeline significantly cleaner, effectively eliminating the old, frustrating days of wasting your first morning in Kathmandu waiting in long queues at the government tourism offices.

+--------------------------------------------------------------------------+
|                       THE 2026 APPLICATION PIPELINE                      |
|                                                                          |
|  [ Gather Documents ] --> [ Submit to Agency ] --> [ Digital Approvals ]|
|  (Passport, Visa,          (TAAN-Registered)        (QR Code Issued       |
|   Photos, Insurance)                                 Before Arrival)     |
+--------------------------------------------------------------------------+

Step 1: Gather Your Vital Documents

Before applying, ensure you have clean, digital copies of the following:

  • Your physical passport (with a minimum of 6 months validity beyond your planned trek end date).

  • Your valid Nepal Tourist Visa number or your official Pre-Arrival Visa Submission ID.

  • 2 to 4 recent passport-sized photographs (digital and physical prints).

  • A detailed day-by-day travel itinerary with exact entry/exit dates and trailhead points.

  • A comprehensive travel insurance certificate in English, stating explicit coverage for high-altitude trekking and emergency helicopter evacuation up to your maximum route elevation.

Step 2: Choose a TAAN-Registered Trekking Agency

Because individual travelers cannot upload files directly into the restricted area portal, you must contact a licensed local agency. Verify their status with the Trekking Agencies’ Association of Nepal (TAAN) and finalize your guide assignment.

Step 3: Online Submission and Vetting

Your agency will initiate the workflow through the Department of Immigration (DoI) portal at nepaliport.immigration.gov.np. They will upload your documentation, visa data, insurance records, and your assigned guide’s official credentials into the computerized immigration system.

Step 4: Collection and Trail Checkpoints

While you can track the approval progress online using your unique Application Submission ID, the final permit is not fully activated until your agency presents your physical passport for a security check at the immigration office in Kathmandu. Once verified, a physical permit sticker or printout with an integrated tracking QR code is issued. Collect this from your agency before leaving Kathmandu, as it must be scanned by electronic checkpoint officers along the trail.

Common Permit Mistakes Trekkers Make

  • Assuming One Permit Covers an Entire Circuit: Many popular trekking loops cross regional borders. If you choose to hike the Manaslu Circuit, you will walk out via Dharapani, which officially sits inside the Annapurna zone. This means you legally require a Manaslu RAP, a Manaslu Conservation Area Permit (MCAP), and an Annapurna Conservation Area Permit (ACAP).

  • Carrying Only Digital Copies on Your Phone: While the registration system is fully digitalized, power outages and cold can drain smartphone batteries instantly, and cellular service can drop entirely in deep river canyons. Checkpoint guards frequently demand physical paper documents to stamp. Always carry high-quality printed copies of all permits.

  • Failing to Read the Insurance Fine Print: Nepal’s immigration department will reject permit applications if your travel insurance lacks explicit high-altitude clauses. Generic travel insurance policies often cap medical evacuation at 3,000 meters. Ensure your policy documents explicitly state coverage for helicopter rescue above 4,000 or 5,000 meters, depending on your trek.

  • Attempting to Evade Checkpoints: Trying to bypass official checkpoint gates via alternative side trails to avoid permit fees or mandatory guide rules is a serious legal offense. If caught, you face immediate fines (starting at NPR 12,000), permit confiscation, and being escorted back to the nearest road, while your insurance coverage becomes completely invalid.

Why You Must Book Through a Licensed Trekking Agency

The modern regulatory environment in Nepal makes a local, registered agency an essential partner for a successful expedition. Working with an accredited provider guarantees:

  • Legal Compliance: Seamless digital processing of complex national park, local municipality, and restricted area permits.

  • Safety Integration: Booking a first-aid trained, certified guide who monitors your health, tracks Acute Mountain Sickness (AMS) symptoms, and understands local weather patterns.

  • Logistical Management: Securing coveted teahouse rooms during the chaotic peak months (October/April) when popular lodges fill up completely by 2:00 PM.

  • Emergency Response: Under 2026 laws, emergency search and rescue coordination is a strict legal responsibility of your hosting agency. If an emergency arises, your agency can dispatch a rescue helicopter within minutes.

Frequently Asked Questions (FAQs)

Do I need a permit for every single hike in Nepal?

No. Short day hikes outside of protected park boundaries (such as walking along the immediate Kathmandu Valley rim trails like Nagarkot or Champadevi) do not require specialized national permits or E-TIMS registration cards.

Can I do the Everest Base Camp trek completely on my own without a guide?

No, not anymore. Under the current safety policies enforced across Nepal, all major protected areas—including the Sagarmatha (Everest), Annapurna, and Langtang networks—mandate that foreign trekkers be accompanied by a licensed local guide hired through an approved agency.

Can I apply for a Restricted Area Permit on my own?

While the landmark March 2026 update allows solo travelers to visit restricted regions without needing a second foreign companion, you still cannot apply directly over the counter yourself. The application must be filed on your behalf by a TAAN-registered local agency, and a licensed guide must accompany you throughout the restricted zone.

What happens if my flight to Lukla is delayed and my permit dates change?

Local checkpoint guards understand that mountain weather is highly unpredictable. For standard national park and municipality permits, minor schedule adjustments due to flight delays or health issues are easily accommodated at the trail gates. However, if you are changing your dates inside a highly restricted zone (like Upper Mustang), your guiding agency must update the immigration system portal to adjust your timeline.

Final Thoughts

Nepal’s trekking permit system plays a crucial role in protecting the country’s extraordinary mountain landscapes while ensuring visitor safety and supporting local communities. Whether you’re planning the legendary Everest Base Camp Trek, exploring the Annapurna region, discovering the beauty of Langtang, or venturing into remote destinations like Mustang and Dolpo, understanding permit requirements is essential for a smooth trekking experience.

Regulations can evolve from year to year, making it important to stay informed and work with trusted local experts whenever possible. By obtaining the correct permits and following responsible trekking practices, you’ll not only enjoy a safer journey but also contribute to the preservation of Nepal’s natural and cultural treasures for future generations.

Need Help Arranging Trekking Permits in Nepal?

Our dedicated local trekking specialists are ready to handle the administrative logistics so you can focus entirely on your physical preparation. Let our professional team assist you with:

  • Flawless processing of National Park, Municipality, and E-TIMS documentation

  • Advanced Restricted Area Permit (RAP) pre-arrival clearance

  • Sourcing top-tier, certified, first-aid trained mountain guides and porters

  • Managing domestic mountain flights (Kathmandu/Ramechhap to Lukla) and ground logistics

  • Booking prime teahouse accommodations during peak seasons

  • Designing fully customized, perfectly acclimatized Himalayan itineraries

Contact us today to begin planning a seamless, legally compliant, and unforgettable Himalayan adventure in Nepal!

Digital Nomad Visa Nepal: Complete Guide for Remote Workers in 2026

The world of work has changed dramatically over the past few years. More professionals than ever are working remotely, building businesses online, freelancing, consulting, or managing companies from anywhere with a reliable internet connection.

As digital nomads search for destinations that combine affordability, natural beauty, cultural richness, and a slower pace of life, Nepal has emerged as one of the most exciting locations in Asia. Known for its majestic Himalayan mountains, ancient temples, vibrant culture, and welcoming people, Nepal offers a unique experience that differs significantly from traditional digital nomad hubs like Bali, Thailand, or Portugal.

Imagine waking up to the crisp morning air of the Himalayas. You grab a hot, steaming cup of local Himalayan coffee or spiced masala chai, open your laptop, and log into a Zoom call with a backdrop of snow-capped peaks that most people only see on postcards.

For years, the phrase “digital nomad Nepal” meant playing a stressful game of visa roulette—constantly tracking your short-term tourist limits, planning forced border runs, and dealing with unpredictable internet connections. However, entering 2026, the global remote work landscape has shifted completely, and Nepal has formally thrown its doors open to the location-independent workforce.

With the official rollout and expansion of its long-term stay options for remote workers, interest in the Nepal Digital Nomad Visa has grown rapidly. Whether you’re a freelancer, entrepreneur, software developer, content creator, marketer, or remote employee, Nepal presents an unparalleled opportunity to work while experiencing one of the world’s most remarkable destinations.

This comprehensive guide covers everything you need to know about the Nepal Digital Nomad Visa, living costs, internet quality, taxation, coworking spaces, and the best places to stay.

What Is the Nepal Digital Nomad Visa?

digital-nomad-visa

A digital nomad visa (DNV) is a specialized residence permit designed for individuals who earn income from foreign employers, international clients, or online businesses while residing temporarily in another country. Unlike traditional work visas, digital nomad visas do not require employment from a local company.

The Nepal Digital Nomad Visa officially replaces the old, exhausting cycle of utilizing short-term tourist entries for remote work. Conceived by the Nepal Tourism Board, the Office of the Prime Minister, and the Department of Immigration, this structured framework lets you legally live and work in the country while earning your income entirely from foreign sources.

Key Highlights of the Program

  • Long-Term Security: The visa program structures your stay via a five-year multiple-entry framework, granted in renewable chunks of at least one year per entry.

  • Freedom of Movement: As a multiple-entry visa, you can come and go as you please without voiding your residency status or having to reapply.

  • Spouse & Dependent Inclusions: You don’t have to leave your loved ones behind; the policy allows primary applicants to include their legal spouses and immediate dependents in their stay.

Important Note: To protect local employment, digital nomad visa holders are strictly prohibited from engaging in local business activities or taking up domestic jobs within the Nepalese market. Your income must come entirely from entities established outside of Nepal.

Why Remote Workers Are Choosing the Himalayas

Many digital nomads initially consider established hotspots such as Bali, Chiang Mai, Lisbon, or Medellín. However, Nepal offers distinct advantages that make it an increasingly attractive alternative for location-independent professionals.

Traditional Hubs Nepal: The Himalayan Alternative
High Tourist Saturation Authentic Cultural Immersion
Crowded Coastal Cafes Majestic Himalayan Views
Rising Living Costs Incredible Budget Value
Commercialized Experiences Genuine Local Connections
Overcrowded Coworking Spaces Peaceful and Inspiring Work Environments
Fast-Paced Lifestyle Balanced Work-Life Experience
Limited Adventure Variety Trekking, Wildlife, Culture & Spirituality
Expensive Accommodation Affordable Long-Term Living
Highly Competitive Nomad Communities Growing Opportunities for Meaningful Networking
Typical Remote Work Destinations One of Asia’s Most Unique Remote Work Experiences

1. Affordable Cost of Living

Compared to many Western countries and even saturated Southeast Asian hubs, Nepal provides exceptional value for money. A remote worker can comfortably live a high-quality lifestyle in Nepal while spending significantly less on accommodation, transportation, food, entertainment, and domestic travel. This high affordability allows digital nomads to extend their travels, maximize their personal savings rate, or reinvest heavily into growing their online businesses.

2. Incredible Natural Beauty

Few countries offer the dramatic landscapes found in Nepal. You can actively work from a trendy urban café in Kathmandu one week and enjoy tranquil mountain views in Pokhara the next. The country boasts easy access to bucket-list attractions, including:

The ability to seamlessly combine daily professional productivity with world-class outdoor adventure makes Nepal highly appealing to the active remote worker.

3. Rich Culture, Heritage, and Community

Nepal is home to centuries-old traditions, ancient architecture, and deeply spiritual lifestyles. Remote workers frequently seek meaningful cultural immersion rather than simply working from an isolated beach resort. Nepal offers a rich tapestry of Buddhist monasteries, Hindu temples, traditional Newari villages, local festivals, and diverse ethnic communities. Nepalese culture operates deeply on the ancient Sanskrit proverb “Atithi Devo Bhava” (The Guest is God), making it one of the safest and most genuinely welcoming countries in the world.

4. Growing Digital Infrastructure

Internet connectivity in Nepal has undergone a massive modernization effort. Scheduled power outages (known historically as “load-shedding”) are entirely a thing of the past. Major cities now boast high-speed fiber internet, expanding 4G and 5G mobile networks, modern coworking spaces, and beautifully designed laptop-friendly cafés.

Why More Remote Workers Are Looking Beyond Traditional Hubs

For years, destinations like Bali, Chiang Mai, Lisbon, and Medellín dominated the digital nomad scene. While these locations remain popular, many remote workers are beginning to seek something different—less crowded, more authentic, and better connected to nature.

Nepal offers a refreshing alternative.

Instead of competing for a seat in a packed beachfront café, digital nomads can work with panoramic Himalayan views, explore centuries-old cultural heritage sites, and enjoy a significantly lower cost of living. The country combines productivity, adventure, spirituality, and cultural immersion in ways that few destinations can match.

Whether you’re a freelancer, entrepreneur, remote employee, or content creator, Nepal provides an opportunity to experience a lifestyle that goes beyond the typical digital nomad routine.

The Nepal Advantage

✅ Authentic cultural experiences

✅ Affordable long-term stays

✅ Stunning mountain landscapes

✅ Growing coworking ecosystem

✅ Adventure at your doorstep

✅ Wellness and spiritual retreats

✅ Friendly local communities

✅ Less crowded than mainstream nomad destinations

In a world where many digital nomad hubs are becoming increasingly crowded and expensive, Nepal stands out as one of the last truly transformative destinations for location-independent professionals.

Who Can Apply? Eligibility & Core Income Streams

The Nepal Digital Nomad Visa targets individuals who can demonstrate an independent income stream generated entirely outside the host country. The primary eligible groups include:

  • Remote Employees: Professionals working full-time or part-time for companies located outside Nepal (e.g., software engineers, marketing specialists, project managers, data analysts).

  • Freelancers and Contractors: Individuals providing independent services to international clients (e.g., graphic designers, writers, SEO consultants, web developers, video editors).

  • Entrepreneurs and Startup Founders: Business owners operating location-independent companies, such as SaaS founders, agency owners, and e-commerce entrepreneurs.

  • Content Creators: Digital creators earning income through YouTube, blogging, affiliate marketing, online courses, or international sponsorships.

Financial & Document Requirements

One of the most attractive aspects of the Nepal Digital Nomad Visa is its accessibility. Compared to the steep income thresholds required by European nations or regional neighbors like Japan, Nepal offers some of the most reasonable financial barriers in the world.

To successfully apply, remote workers must fulfill the following core requirements:

1. Proof of Remote Income or Savings

The government provides two flexible pathways to prove your financial self-sufficiency:

  • The Income Path: A minimum monthly income of $1,500 USD derived from sources outside of Nepal.

  • The Savings Path: A verifiable bank balance of at least $20,000 USD held in a recognized financial institution.

2. Verification of Remote Professional Status

You must explicitly prove that your profession can be performed completely online. This is demonstrated via:

  • Active employment contracts, accompanied by a formal letter from your employer verifying your remote status.

  • Freelance agreements, client invoices, a professional portfolio, and recent business bank statements.

  • Official business registration certificates and corporate revenue statements if you own an online agency or e-commerce shop.

3. Comprehensive Health Insurance

Healthcare infrastructure in Nepal varies wildly between urban hubs and remote trekking routes. To ease the burden on public systems, the government mandates that all applicants hold an international health insurance policy with a minimum coverage limit of $100,000 USD, specifically valid for treatment in Nepalese hospitals and inclusive of emergency medical evacuation provisions.

4. Valid Passport & Clean Background

Applicants need a passport valid for at least six months beyond their intended stay, alongside a clean criminal record supported by a police clearance certificate from their home country.

Step-by-Step Application Process

Navigating immigration systems can occasionally feel daunting, but the application process for Nepal’s DNV has been thoroughly digitized through the Department of Immigration’s updated portal.

Step 1: Gather Documentation

Prepare digital copies of your passport, income proofs (such as 3 to 6 months of bank statements, salary slips, or tax returns), corporate registries, insurance documents, passport photographs, and your background check.

Step 2: Submit the Online Application

Access the official Department of Immigration government portal. Fill out the comprehensive digital nomad application form with your personal details, travel history, professional background, and your proposed residential address within Nepal. Upload all scanned supporting documentation.

Step 3: Verification and Fee Review

Pay the designated visa processing fee directly through the portal’s integrated digital payment gateway. Once paid, your application enters a sequential review process involving identity verification by the Ministry of Home Affairs and financial vetting by the Ministry of Finance.

Step 4: Receive Approval & Visa Issuance

Upon approval, you will receive an official electronic visa confirmation. When you arrive at Tribhuvan International Airport (KTM) in Kathmandu, immigration officers will verify your biometric data and stamp your official long-term residence permit into your passport.

Unmatched Incentives: Taxes, Banking, and Lifespan Perks

The true genius of Nepal’s digital nomad framework lies in the auxiliary perks wrapped into the legislation. The government isn’t just letting remote workers stay; they are actively making it practical to build a highly functional everyday life.

1. The 5% Flat Tax Incentive

Taxation is usually the ultimate headache for long-term travelers. Nepal addresses this with an incredibly competitive, business-friendly structure:

  • First 183 Days: Completely tax-exempt on foreign-earned income.

  • Beyond 183 Days: If you reside in Nepal for more than 183 days in a calendar year, you become a tax resident and are subject to an incredibly lucrative, concessional flat 5% income tax rate on your foreign earnings.

2. Local Banking Freedoms

Constantly relying on international credit cards or paying high ATM withdrawal fees gets old fast. DNV holders are legally permitted to open personal bank accounts with local commercial banks and conduct transactions in foreign currency.

  • The $50,000 Rule: If your local savings exceed $50,000 USD, any surplus funds can be freely transferred back to foreign accounts at any time.

  • Account Liquidation: Should you choose to leave the country permanently or let your visa lapse after five years, you have the explicit right to withdraw and repatriate your entire bank account balance.

3. Vehicle Ownership & Licensing

Under the nomad visa guidelines, you are legally entitled to purchase and register a personal vehicle (car or motorcycle) in your own name. Furthermore, the policy officially accredits valid driving licenses issued in your country of origin, saving you from navigating complex local licensing exams.

Technical Infrastructure & Internet Quality

Reliable internet is non-negotiable for digital nomads. While copper-wire systems caused headaches in the past, modern fiber networks have completely transformed urban Nepal.

Fiber Internet

Fixed broadband fiber connections are the absolute standard in urban centers via major internet service providers (ISPs) like  Vianet, CG Net, NT-Fiber, WorldLink, DishHome, and Classic Tech.

  • Speeds Available: Commercial lines easily offer 50 Mbps, 100 Mbps, 300 Mbps, and up to 1 Gbps.

  • Reliability: Highly stable and perfectly optimized for seamless Zoom video calls, cloud computing, continuous streaming, and large file transfers.

  • Cost: Packages are remarkably economical, ranging from $15 to $30 USD per month.

Mobile Data & 5G

4G networks provide exceptional coverage across major cities and highways, while 5G rollouts continue expanding rapidly within the Kathmandu Valley and Pokhara. The primary telecom networks are Ncell and Nepal Telecom (NTC). A massive 20GB high-speed mobile data pack can be bought for under $8 USD, serving as an excellent and affordable backup hotspot during occasional weather-related disruptions.

Pro-Tip for Nomads: While urban infrastructure is highly dependable, rural connectivity drops significantly the moment you enter deep trekking trails or high-altitude mountain villages. If you plan a multi-day trek, use satellite internet alternatives where available (like Starlink in select lodges) or notify your clients that you will be temporarily offline.

Best Cities in Nepal for Digital Nomads

Choosing the right base can significantly impact your remote work experience. Nepal offers a diverse spectrum of environments, from high-energy metropolitan hubs to peaceful lakeside sanctuaries.

1. Kathmandu: The High-Energy Capital & Business Hub

Kathmandu is Nepal’s capital, primary economic engine, and the core epicenter of the country’s startup ecosystem.

+--------------------------------------------------------------+
|                          KATHMANDU                           |
|  [ Fastest Fiber Internet ]      [ Largest Coworking Network]|
|  [ Top Private Hospitals  ]      [ Endless Cultural Sites ]  |
+--------------------------------------------------------------+
  • The Vibe: Fast-paced, historic, chaotic, and buzzing with networking opportunities.

  • Where to Work: Neighborhoods like Jhamsikhel and Patan are packed with specialty coffee roasters and laptop-friendly spaces.

  • Best For: Entrepreneurs, tech professionals, and long-term residents who want maximum networking and access to modern amenities.

2. Pokhara: The Peaceful Lakeside Sanctuary

Pokhara is widely considered the crown jewel of the digital nomad lifestyle in Nepal. Situated right alongside the peaceful waters of Phewa Lake and directly underneath the majestic Annapurna range, it perfectly balances productivity with lifestyle.

  • The Vibe: Laid-back, health-conscious, adventurous, and incredibly scenic.

  • Where to Work: The Lakeside district is lined with open-air cafes featuring steady Wi-Fi, organic menus, and a thriving expat community.

  • Best For: Freelancers, lifestyle entrepreneurs, writers, and creatives who want a perfect work-life balance and instant access to weekend hiking trails.

3. Lalitpur (Patan): The Creative & Artistic Suburb

Technically a distinct historic city separated from Kathmandu by the Bagmati River, Patan acts as the trendy, artsy extension of the capital.

  • The Vibe: Highly collaborative, design-forward, and rich in traditional Newari architecture.

  • Where to Work: Thriving creative coworking spaces like Rem.Work and Work Around, hidden courtyard cafes, and artisanal workshops.

  • Best For: Designers, consultants, remote freelancers, and those who want a tight-knit neighborhood feel within arm’s reach of Kathmandu’s main facilities.

4. Bhaktapur: The Cultural Time Capsule

Located on the eastern edge of the Kathmandu Valley, Bhaktapur offers a quieter, deeply historic environment.

  • The Vibe: Timeless, meditative, and visually stunning with its red-brick pavement and well-preserved wood carvings.

  • Best For: Researchers, writers, and creative professionals seeking minimal distractions, fewer tourist crowds, and an authentic window into ancient Nepalese history.

Comprehensive Cost of Living Breakdown

Your purchasing power goes incredibly far in Nepal. Because your earnings are generated in stronger foreign currencies while your local daily expenses are paid in Nepalese Rupees (NPR), maintaining an exceptional standard of living is highly affordable.

A comfortable, mid-range monthly budget for a single digital nomad generally hovers between $900 and $1,300 USD. Let’s break down the realistic numbers:

Accommodation Costs

  • Budget Studio/Apartment: $150 – $300 USD / month (Ideal for solo travelers seeking clean, basic, and functional local housing).

  • Mid-Range Fully Furnished Apartment: $300 – $700 USD / month (Located in prime digital nomad areas, featuring premium fiber internet, backup power options, air conditioning, and modern appliances).

  • Premium/Luxury Serviced Residences: $700 – $1,500+ USD / month (Luxury penthouses or serviced mountain-view properties with inclusive housekeeping, gyms, and top-tier security).

Food & Dining Costs

Local dining is incredibly cheap, and even high-end Western cafes are highly affordable:

  • Local Restaurant Meal (e.g., Momos or standard Dal Bhat): $3 – $8 USD

  • Mid-Range Tourist/Expat Restaurant Meal: $5 – $15 USD

  • Specialty Cafe Cappuccino / Latte: $1.50 – $3 USD

  • Average Monthly Food/Groceries Budget: $150 – $300 USD

Transportation & Utilities

  • Monthly Infrastructure Utilities (Fiber internet, mobile data, electricity): $30 – $60 USD

  • Monthly Local Transportation (Using ride-sharing apps like Pathao/inDrive or local taxis): $30 – $100 USD

Coworking Spaces & Networking Opportunities

As the community grows, dedicated coworking spaces continue expanding across major urban areas. These hubs provide digital nomads with guaranteed internet uptime, backup power generators, professional meeting rooms, and a focused environment to network with local entrepreneurs and international remote workers.

Space Name Location Primary Features
Rem.Work Lalitpur (Patan) Premium high-speed fiber, vibrant local startup community, ergonomic seating, and excellent networking events.
Work Around Kathmandu Quiet zones, meeting rooms for client calls, outdoor garden workspace, and free-flowing local coffee.
Lakeside Hubs & Cafes Pokhara Indoor/outdoor hybrid spaces overlooking the lake, relaxed networking, ideal for creative freelancers.

Kathmandu’s tech and startup ecosystem is growing rapidly. By working from these spaces, you can easily attend local entrepreneur meetups, tech conferences, and collaborative business networking groups that open doors for unexpected international partnerships.

Weekend Adventures: Maximizing Work-Life Balance

One of Nepal’s greatest strengths is that your weekends will feel like a bucket-list vacation. You don’t have to wait for a two-week annual holiday to experience world-class travel.

  • Short Day Hikes: Explore the scenic rims of the Kathmandu Valley, such as Nagarkot, Shivapuri, Champadevi, or Dhulikhel, offering panoramic views of the Himalayas right after your Friday shift ends.

  • Short Trekking Escapes: Take a week of light remote work from Pokhara and spend your long weekends conquering accessible, world-famous routes like the Mardi Himal trek, Poon Hill, or paths leading toward Annapurna Base Camp.

  • Wildlife Safaris: Head south to the sub-tropical plains of Chitwan National Park or Bardia National Park for a weekend of elephant tracking, canoeing down crocodile-filled rivers, and spotting wild rhinos and Bengal tigers.

  • Spiritual Retreats: Immerse yourself in profound self-care by booking weekend stays at peaceful Buddhist monasteries, specialized meditation centers, or holistic yoga retreats scattered around Pokhara and the valley.

       Mon - Fri (Productivity)             Sat - Sun (Adventure)
[ 300 Mbps Fiber ] -> [ Client Calls ]  =>  [ Himalayan Trekking ] -> [ Safaris ]

Challenges of Living in Nepal as a Digital Nomad

Every destination has its unique set of trade-offs. To maintain realistic expectations, digital nomads should be aware of the following local challenges:

  • Infrastructure Differences: While modern buildings are excellent, older neighborhoods or rural areas may not match the strict infrastructure standards of highly developed Western countries. Unpaved roads can turn muddy during the monsoon.

  • Traffic Congestion and Air Quality: Kathmandu experiences heavy traffic congestion during peak commuting hours. Air quality can fluctuate significantly and become dusty, particularly during the dry winter season. Investing in a quality indoor air purifier and wearing a protective mask during active transit is highly recommended.

  • Seasonal Weather (Monsoon): The monsoon season (typically June to September) brings heavy rainfall, which can disrupt domestic flights, cause localized landslides on mountain highways, and temporarily limit outdoor trekking activities.

  • Public Transit Learning Curve: The local public microbus system is chaotic, crowded, and completely un-digitized. However, you can easily bypass this challenge by downloading local ride-sharing apps.

Essential Local Apps for Nomads

  • Pathao: The absolute go-to ride-sharing application in Nepal. You can instantly book incredibly cheap motorcycle taxis (the fastest way to cut through city traffic), order food delivery, or request standard cars.

  • inDrive: A highly popular alternative ride-share app operating on a peer-to-peer bidding system, allowing you to negotiate fares directly with drivers in real-time.

  • eSewa & Khalti: The premier digital wallets in Nepal. Once you open your local digital nomad bank account, you can link it to these apps to seamlessly scan QR codes at local supermarkets, cafes, and utility vendors.

Is Nepal Better Than Bali or Thailand for Digital Nomads?

The answer depends heavily on your personal lifestyle priorities and professional goals.

  • Choose Nepal if you want: Majestic mountain scenery, profound cultural immersion, world-class alpine trekking, deep spiritual experiences, an elite 5% tax incentive, and a refreshing lack of over-tourism or tourist saturation.

  • Choose Bali or Thailand if you prioritize: A beach-centric lifestyle, massive established Western expat communities, active nightclub scenes, and heavily saturated digital nomad ecosystems.

Many remote workers find that while Southeast Asia offers comfortable, predictable tourist paths, Nepal provides a far more authentic, grounding, and personally transformative remote work experience.

Conclusion & Final Thoughts

Nepal is no longer just an exclusive destination for hardcore mountaineers and backpackers. It is rapidly transforming into a compelling, highly strategic option for digital nomads who refuse to compromise between professional productivity, extreme affordability, rich culture, and pristine natural beauty.

From the bustling, historic streets of Kathmandu to the peaceful, mountain-framed lakeside cafés of Pokhara, Nepal offers remote workers an environment where high-tech work and deep geographical exploration coexist seamlessly. For freelancers, entrepreneurs, content creators, and remote employees looking for an intentional life beyond conventional, overcrowded nomad hubs, Nepal provides an experience that is both professionally rewarding and personally life-changing.

As digital nomad visa programs continue to evolve and infrastructure improves throughout 2026, Nepal is firmly poised to become Asia’s premier Himalayan destination for location-independent professionals. Pack your laptop, secure your health insurance, and prepare to elevate your career to a completely new altitude. The roof of the world is waiting for you.

Frequently Asked Questions (FAQs)

Can I apply for the Nepal Digital Nomad Visa if I am an Indian citizen?

No. Under the historic 1950 Indo-Nepal Treaty of Peace and Friendship, Indian citizens do not require a visa to enter, reside, or work in Nepal. Indian remote workers can move, live, and work freely in the country without going through the DNV application process.

Can I bring my family members on this visa?

Yes. The current digital nomad visa framework explicitly allows successful primary applicants to include their legal spouses and dependent children in their long-term residence permit framework.

What happens if I want to leave Nepal before my 5-year visa period expires?

The visa operates on a flexible, multiple-entry framework. You are not forced to stay for five continuous years. You can leave and return at your convenience. If you decide to end your stay permanently, you can fully close your local bank accounts and legally repatriate all your remaining foreign currency funds.

Is the 5% tax applied to money I earn within Nepal?

No, because you are strictly prohibited from earning money within Nepal. The 5% flat tax applies strictly to your foreign-sourced income (your overseas remote salary, freelance client payments, or foreign corporate revenues) if you spend more than 183 days a year inside the country.

Women’s Solo Travel Guide to Nepal (2026): Safety, Trekking, Culture & Essential Tips for Independent Female Travelers

Nepal has solidified its reputation as one of the world’s most empowering and deeply rewarding destinations for solo female travelers. Nestled in the heart of the Himalayas, this vibrant nation offers an unparalleled mix of jagged mountain landscapes, ancient heritage, deep spirituality, and a culture of hospitality that treats visitors with profound respect.

For women seeking adventure, self-discovery, or cultural immersion, Nepal presents a safe and welcoming canvas. The deeply rooted philosophy of Atithi Devo Bhava (The guest is equivalent to God) means that locals—especially in traditional communities—frequently look out for independent female travelers like extended family.

However, traveling solo as a woman in a developing, traditional society requires a thoughtful blend of cultural awareness, smart planning, and practical safety steps. This ultimate comprehensive guide covers everything you need to navigate Nepal safely, confidently, and independently in 2026.

1. Is Nepal Safe for Solo Female Travelers?

solo-travel

The short answer is yes. Nepal is widely considered one of the safest destinations in South Asia for women traveling alone. Violent crime against tourists is exceedingly rare. However, like any travel destination, staying alert and understanding localized risks is key to a smooth journey.

Petty Theft & Scams

In crowded tourist hubs and transit points, petty crimes like pickpocketing, bag snatching, and phone theft can happen.

  • High-Risk Zones: Thamel (Kathmandu), Lakeside (Pokhara), local bus stations, and crowded local festivals or markets.

  • Precaution: Keep your valuables tucked away in secure, zipped compartments and avoid displaying expensive electronics unnecessarily.

Harassment & Staring

While physical aggression is rare, solo women may encounter persistent staring, unwanted attention, or occasional flirtatious comments. This behavior is typically harmless curiosity rather than predatory, but it can feel intrusive.

  • Precaution: Projecting confidence, wearing modest clothing, and maintaining clear boundaries will deter most unwanted attention.

Trekking Risks

Statistically, the greatest threats to solo travelers in Nepal stem from environmental factors rather than crime. Altitude sickness (Acute Mountain Sickness), unpredictable mountain weather, trail accidents, and geographic isolation are serious considerations. Proper preparation and adhering to local trekking regulations mitigate these risks completely.

2. Best Destinations for Solo Female Travelers

Certain destinations in Nepal offer an ideal mix of robust tourist infrastructure, vibrant social scenes to meet fellow travelers, and stellar safety standards.

                    TOP SOLO FEMALE DESTINATIONS
                                │
         ┌──────────────────────┼──────────────────────┐
         ▼                      ▼                      ▼
  Lakeside, Pokhara      Thamel, Kathmandu       Bandipur Village
(Relaxed, Safe, Easy)  (Vibrant, Social, Hub)  (Charming, Cultural)

Pokhara (Lakeside): The Perfect Soft Landing

Pokhara is arguably the most female-friendly city in South Asia. The Lakeside district is highly walkable, clean, and lined with cozy cafes, yoga retreats, and shops overlooking Phewa Lake. It boasts a relaxed atmosphere, exceptionally low crime rates, and serves as the ultimate gateway to the Annapurna region.

Kathmandu: The Vibrant Cultural Hub

As the capital city, Kathmandu is the energetic heart of Nepal. While chaotic, it is packed with historic temples, UNESCO World Heritage Sites, and social hostels. Staying in Thamel gives you access to walking tours, gear shops, and social cafes, while staying near Boudhanath Stupa provides a peaceful, spiritual environment centered around Tibetan Buddhist culture.

The Annapurna Region: Pristine, Well-Marked Trails

For trekkers, routes like Ghorepani Poon Hill, Mardi Himal, Annapurna Base Camp, and the classic Annapurna Circuit offer fantastic infrastructure. Trails are highly visible, frequently traveled, and lined with cozy teahouses, making them incredibly approachable for solo travelers looking to meet others.

Bandipur: A Secure Step Into Newari Tradition

This beautifully preserved, pedestrian-only hilltop town is a living museum of traditional Newari architecture. With no motorized vehicles allowed on its main brick street, it offers a peaceful, tight-knit communal atmosphere where solo women can wander safely at any hour.

Lumbini: A Sanctuary for Reflection

The birthplace of Buddha is a serene destination in the southern plains. Women traveling alone appreciate its calm, meditative atmosphere, historic monasteries built by various nations, and renowned meditation centers.

3. Solo Trekking in Nepal & Hiring Female Guides

Trekking through the Himalayas is a transformative experience, but doing it solo as a woman requires a careful assessment of safety and regulations.

       Body (Physical Challenge) + Speech (Local Connection) + Mind (Confidence)
                                        │
                                        ▼
                        THE REWARDS OF MOUNTAIN JOURNEYS

The New Trekking Regulations

The Government of Nepal has implemented stricter safety guidelines that mandate licensed guides for most high-altitude trekking zones to prevent solo trekkers from going missing in remote regions. Even on unrestricted trails, trekking entirely alone without a companion or guide is highly discouraged due to sudden weather shifts and terrain hazards.

The Rise of Female Trekking Guides

The demand for certified female trekking guides has surged significantly. Hiring a female guide or joining an all-women group trek offers unique advantages for independent travelers:

  • Complete Comfort: It eliminates any potential vulnerability or social awkwardness regarding rooming and personal space in remote mountain teahouses.

  • Exclusive Cultural Access: Female guides bridge the gap into the private worlds of Himalayan women. You will find yourself invited into local teahouse kitchens, learning about matriarchal structures, and sharing stories that male guides rarely have access to.

  • Economic Empowerment: Tourism in Nepal has historically been male-dominated. By consciously hiring a certified woman guide, you directly fund female financial independence and encourage sustainable career tracks for young women in mountain communities.

Trusted Women-Led Agencies: Look into reputable organizations like 3 Sisters Adventure Trekking and their sister NGO Empowering Women of Nepal (EWN) in Pokhara, or specialized Kathmandu-based female guiding agencies. Always ensure your guide holds an official license from the Trekking Agencies Association of Nepal (TAAN).

4. Understanding Cultural Expectations & Dress Codes

Nepal remains a traditional, patriarchal, and conservative society. Understanding local norms instantly commands respect from communities and significantly minimizes unwanted attention.

Dress Moderately (The Absolute Rule)

While brief clothing is tolerated inside the immediate backpacker bubbles of Thamel or Lakeside, dressing revealingly outside these zones is considered highly inappropriate.

  • Cities & Villages: Keep your shoulders and knees covered. Loose, lightweight linen trousers, maxi skirts, and t-shirts are excellent choices. Avoid low-cut tops, short shorts, and spaghetti straps.

  • Religious Sites: When visiting temples or monasteries, always dress modestly. Carry a light scarf or shawl in your daypack to drape over your shoulders or head when required. Always remove your shoes before entering temple interiors.

Social Etiquette & Boundary Setting

  • The Namaste Greeting: Avoid initiating physical contact, like handshakes, with local men unless they offer first. Instead, press your palms together at chest level and say “Namaste”. It is a beautiful, deeply respected greeting that naturally establishes a polite personal boundary.

  • The “Marriage Question”: Locals are deeply family-oriented and will casually ask solo women, “Are you married?” or “Where is your husband?” This is almost always innocent small talk. If you want to deter persistent conversation, simply smile and say your husband is working or joining you in a few days. Wearing a simple band on your ring finger works wonders.

  • Monastery Etiquette: Never touch a monk’s robes or sit directly next to them on a bench. Public displays of affection (PDA) are frowned upon throughout the country.

5. Transportation and Accommodation Dynamics

Navigating transit and lodging with a safety-first mindset ensures a stress-free trip.

Transportation Tips

  • Ride-Sharing Apps: In Kathmandu, avoid relying entirely on unmetered street taxis. Download local apps like Pathao or InDrive. They track your ride via GPS, provide driver profiles, and display transparent, fixed pricing.

  • Tourist Buses: When traveling between Kathmandu, Pokhara, and Chitwan, prioritize tourist buses (like Jagadamba, Soyambhu, or Greenline) over local public buses. They offer assigned seating, predictable schedules, better safety standards, and more comfortable drives.

  • Domestic Flights: For longer distances (e.g., Kathmandu to Pokhara or Lukla), domestic flights save massive amounts of time and avoid exhausting, bumpy road journeys.

Accommodation Strategies

Nepal caters beautifully to solo budgets. Look for accommodations that prioritize community and security:

┌─────────────────────────┬──────────────────────────────────┬──────────────────────────────────┐
│ Accommodation Type      │ Best For...                      │ What to Look For                 │
├─────────────────────────┼──────────────────────────────────┼──────────────────────────────────┤
│ Female-Friendly Hostels │ Socializing & meeting partners   │ Female-only dorms, keycard locks │
│ Local Guesthouses       │ Budget comfort & cozy vibes      │ Family-run, excellent reviews    │
│ Authentic Homestays     │ Deep cultural immersion          │ Community-vetted networks        │
│ Boutique Hotels         │ Premium security & relaxation    │ 24-hour reception, central spots │
└─────────────────────────┴──────────────────────────────────┴──────────────────────────────────┘
  • The Safety Checklist: Before booking, verify recent reviews written by other solo female travelers. Ensure the property has secure window locks, proper interior door deadbolts, a 24-hour staffed reception desk, and well-lit entryways.

6. Practical Planning: Best Seasons, Health & Budgets

When to Visit

  • Autumn (September–November): The absolute peak season. Offers crystal-clear mountain views, stable weather, and bustling trails. It is incredibly easy to meet travel partners during these months.

  • Spring (March–May): The second-best window. Wild rhododendrons bloom across the hills, skies are warm, and trekking conditions are excellent.

  • Winter (December–February): Clear, crisp days but freezing temperatures in the mountains. Great for city exploration and lower prices.

  • Monsoon (June–August): Characterized by heavy rainfall, leeches, and potential landslides. High-altitude trekking is limited, though cultural tours remain viable.

Health, Hygiene & Travel Insurance

  • Water Safety: Never drink tap water. Use a refillable bottle equipped with a built-in filter (like LifeStraw or Grayl), use water purification tablets, or utilize filtered water refilling stations at your accommodation.

  • Feminine Hygiene: While pads are widely available in cities, tampons and menstrual cups are exceptionally difficult to find outside Kathmandu and Pokhara. Pack an ample supply of your preferred menstrual products before flying out.

  • Comprehensive Insurance: Ensure your travel insurance policy explicitly covers high-altitude trekking (up to 5,000–6,000 meters) and emergency helicopter medical evacuation.

Sample Daily Budgets for Solo Women

Travel Style Estimated Daily Cost (USD) What It Includes
Budget Traveler $25 – $40 / day Social hostel dorms, local cafes, public/tourist bus transport, and independent city walks.
Mid-Range Traveler $50 – $100 / day Private boutique guesthouse rooms, domestic flights, guided day tours, mid-range dining.
Luxury Traveler $150+ / day Five-star heritage hotels, private vehicle rentals, premium wellness retreats, luxury trekking lodges.

7. Frequently Asked Questions (FAQs)

Is Nepal safe for first-time solo female travelers?

Absolutely. Nepal is highly recommended as a beginner-friendly destination for solo women. The country features a deeply welcoming culture, an established tourist trail, incredibly low rates of violent crime, and a supportive, close-knit global community of travelers.

Can I easily find a female trekking partner in Nepal?

Yes. If you choose not to hire a guide, you can easily find travel partners by staying in social hostels in Thamel or Lakeside, joining dedicated solo travel Facebook groups (like Solo Female Travelers), or looking at notice boards in local cafes.

Do I need to carry cash, or are credit cards widely accepted?

While upscale hotels and restaurants in Kathmandu and Pokhara accept credit cards, Nepal remains a cash-driven economy. You will need local Nepalese Rupees (NPR) for local transport, entry tickets to heritage sites, markets, and all mountain teahouses. Carry a reliable debit card and pull cash from ATMs in major cities before heading into the mountains, as ATMs do not exist on most trekking trails.

Is public display of affection allowed?

No. Nepal is culturally conservative. Holding hands, hugging, or kissing in public—regardless of gender configuration—is frowned upon and will attract uncomfortable, disapproving attention from locals.

Final Thoughts: A Journey of Empowerment

Solo travel through Nepal is far more than an adventurous holiday—it is a deeply transformative experience. Navigating the vibrant, chaotic streets of Kathmandu, looking out over a sea of clouds from an alpine ridge, or sharing a warm cup of milk tea with a local family cultivates a profound sense of resilience, inner peace, and self-confidence.

By respecting local customs, dressing mindfully, choosing verified accommodations, and tapping into the incredible network of local female guides, you will unlock a safe, inspiring, and completely unforgettable journey. Nepal has a unique ability to challenge you, inspire you, and ultimately welcome you home.

Are you interested in evaluating a specific trekking itinerary tailored to your fitness level, or would you like a curated list of the top-rated, female-friendly social hostels in Kathmandu and Pokhara?

plane-image
Easy booking systems

How to book a trip?

select-trip
Select a trip &
make free inquiry
safe-payment
Make online payment to
confirm the trip
traveler-icon
Get confirmation & ready for the trip
Chat on WhatsApp